With the Self-Service license, you have access to both the Ads Manager and the Creative Builder, which means you can independently create your own campaigns and creatives.
Within this article you’re going to learn how to manage the campaign creation of the "Creatives Only" activation model, where the delivery of Ad Tags is managed in external DSP platforms.
Campaign creation can be initiated either from the Advertisers list or from the Campaigns list of a specific advertiser. In both cases, you'll find a "New Campaign" button in the top-right corner.
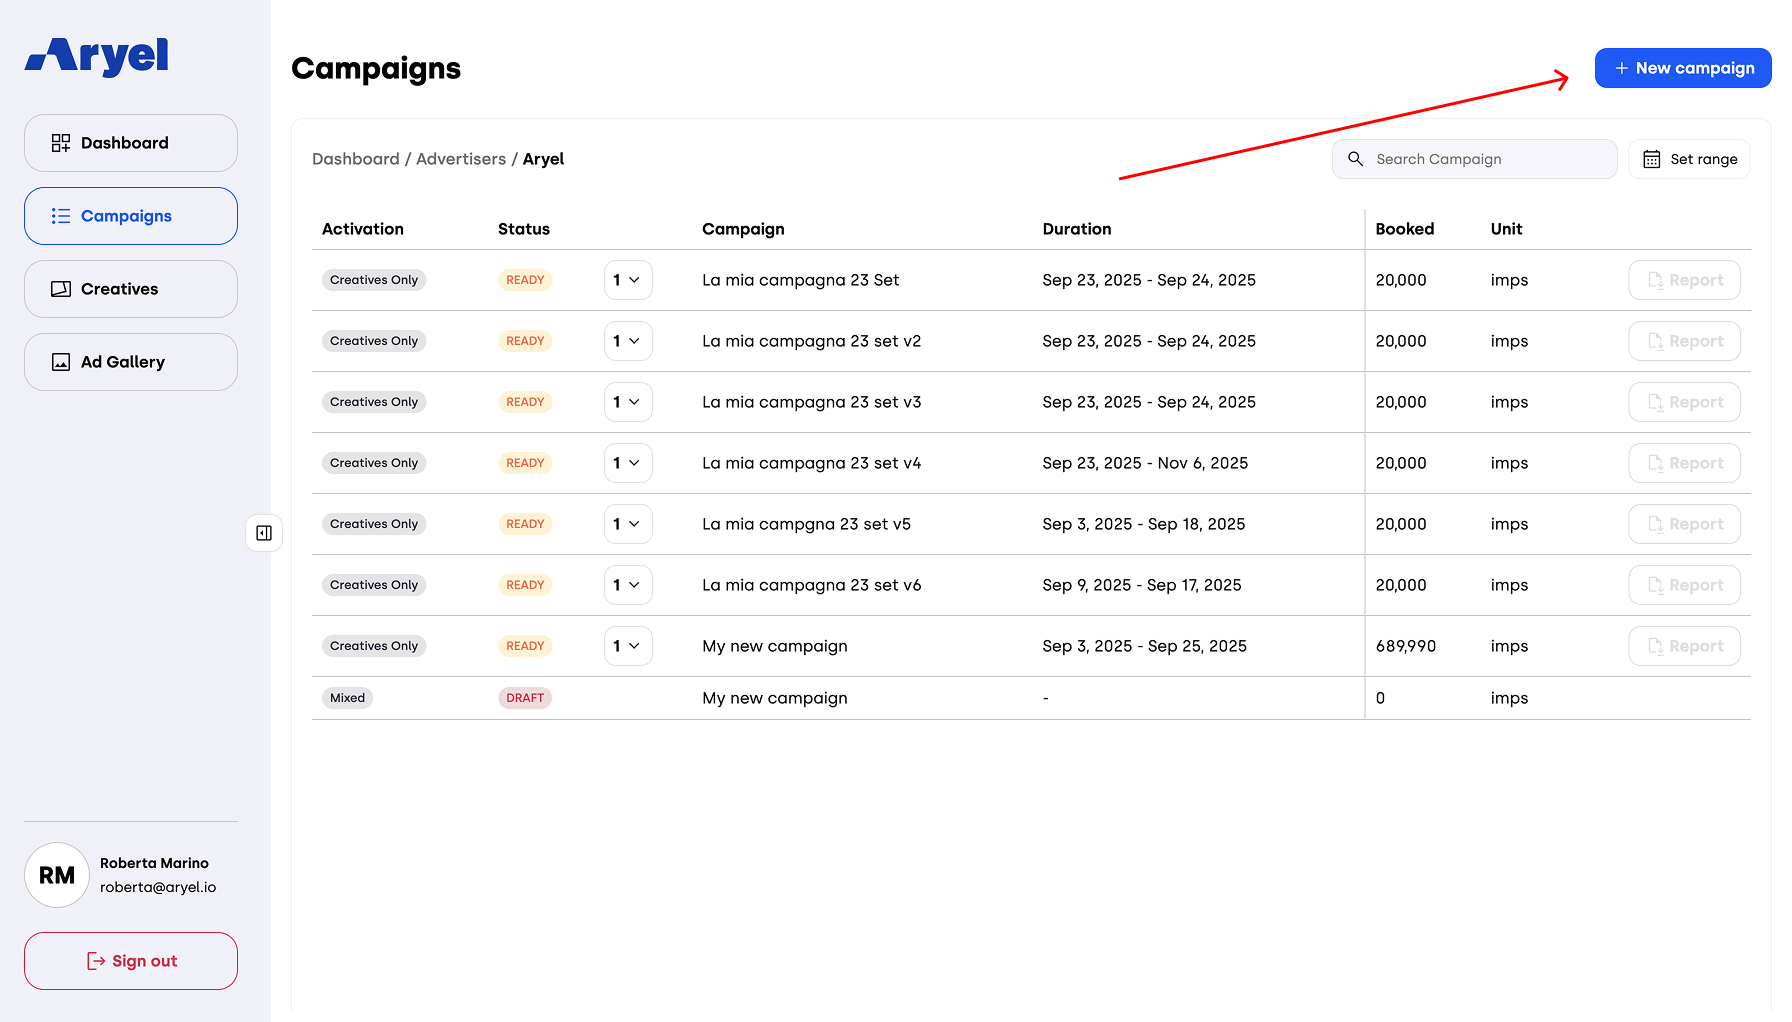
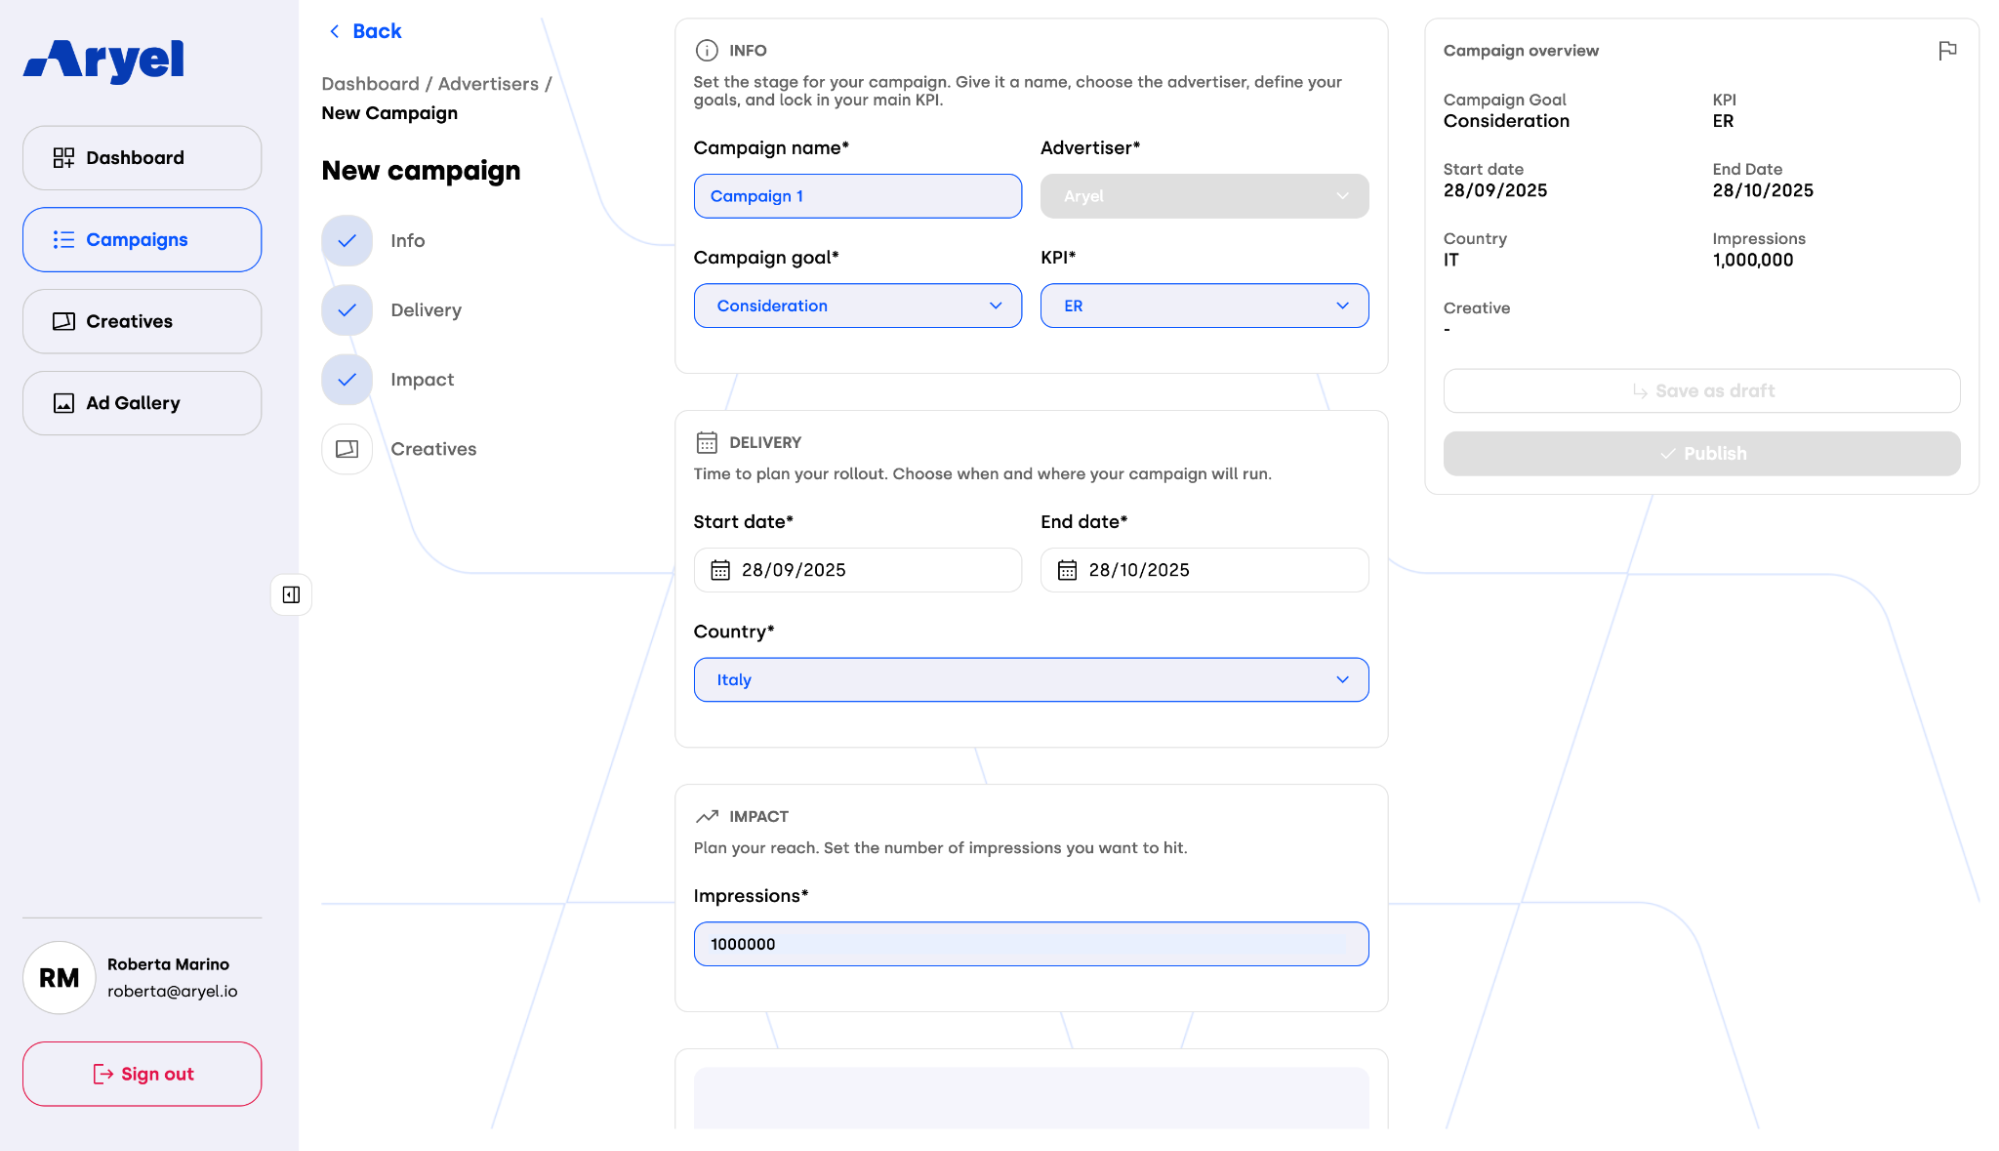
Clicking this button will open a form where you’ll need to enter all the essential details for setting up your campaign:
Campaign Name
Advertiser (this field will be locked if you initiate the creation from within an advertiser’s campaign list)
Campaign Goal
KPI
Start and End Date
Country
Number of Booked Impressions
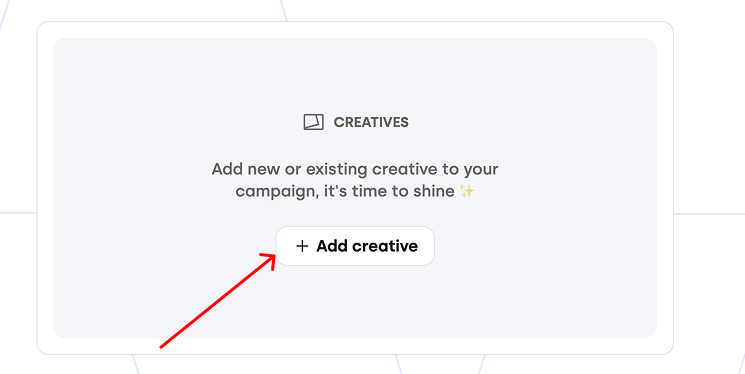
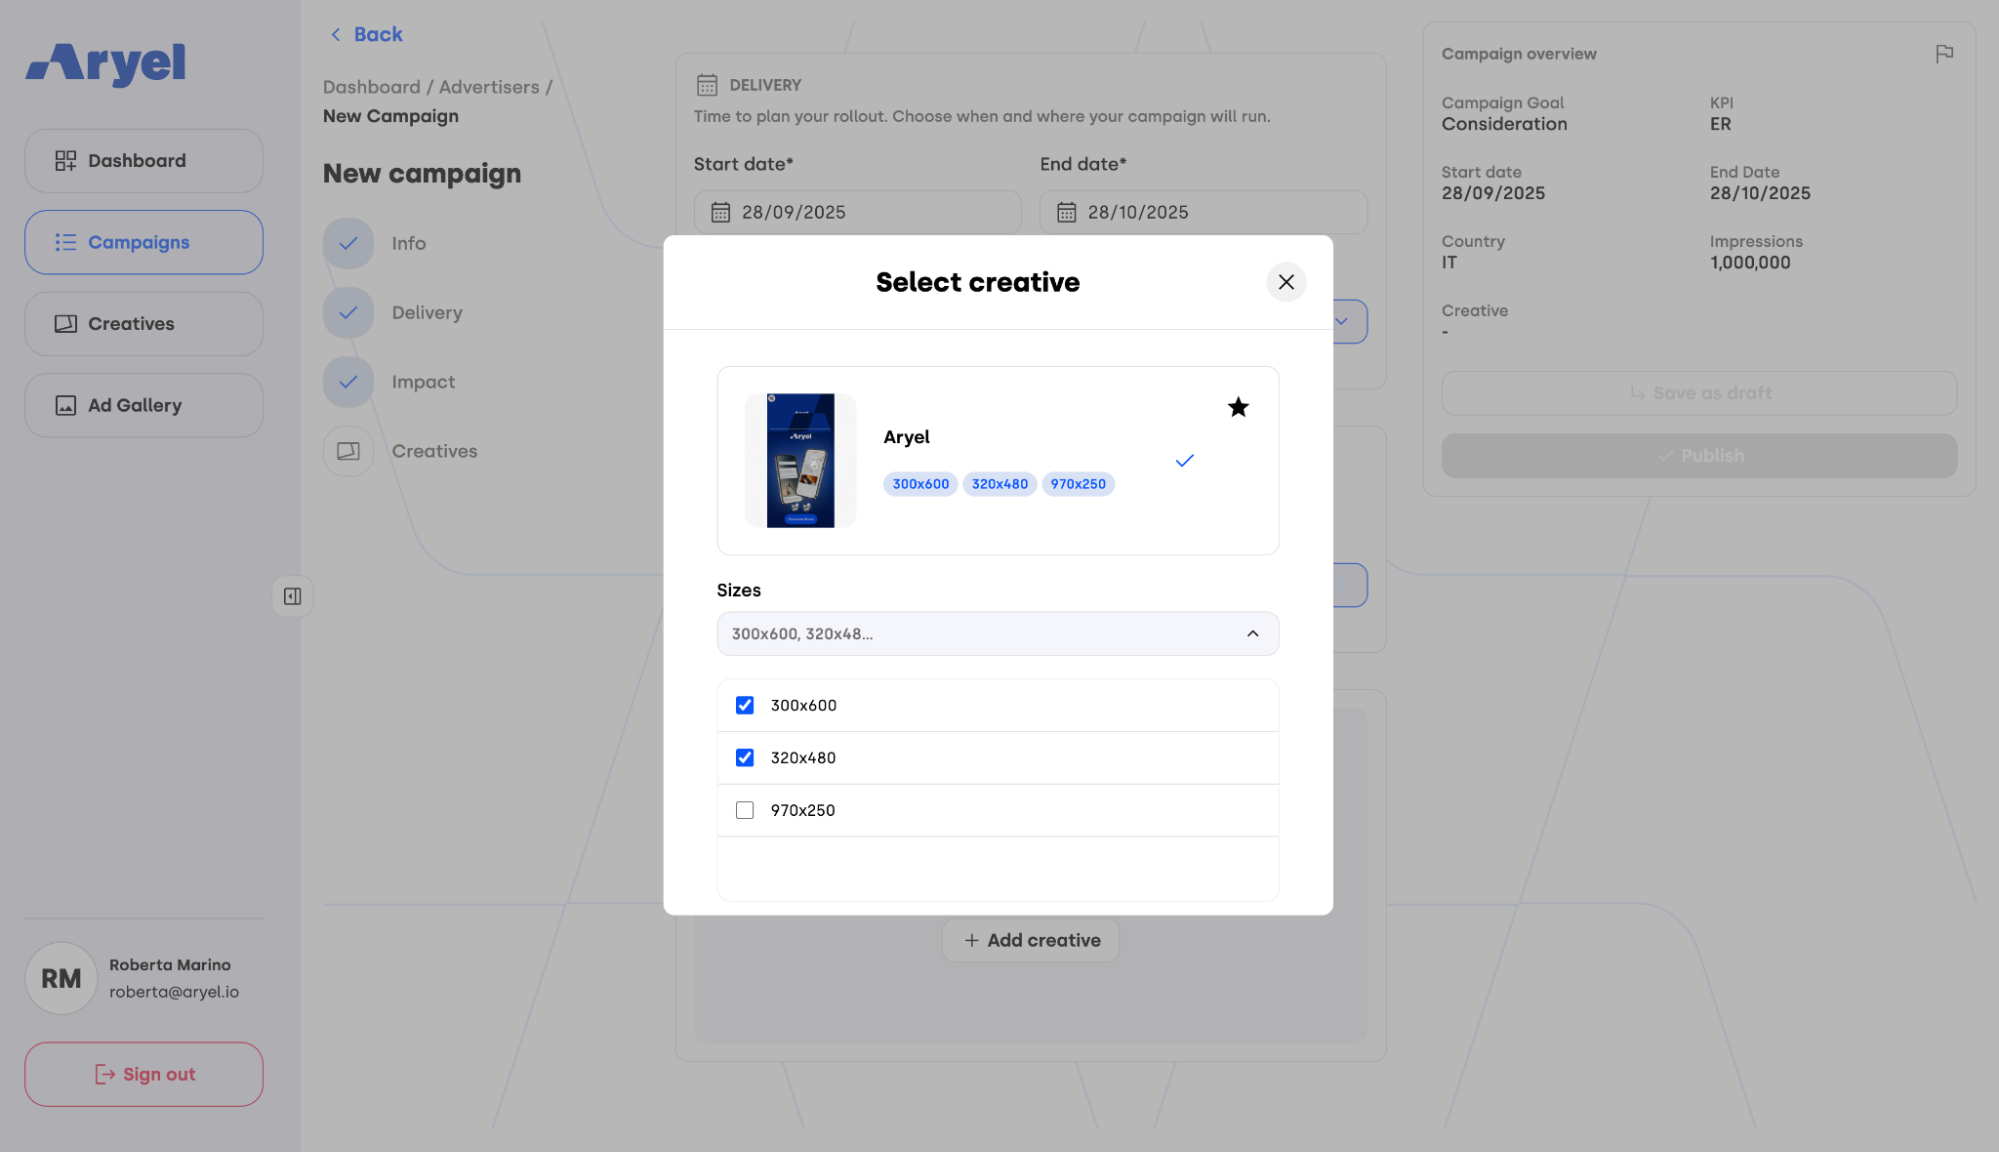
Once you've filled out these fields, you’ll need to select the creative to be linked to your campaign. Click on the "+ Add Creative" button to open a modal displaying all the creatives available in your account.
At the top of the list, you’ll see creatives marked with a star. These are recommended options that align best with the campaign KPI you selected earlier. You can also search for a specific creative by name using the search bar.
If you prefer to build a new creative, you can click on the "+ New Creative" button instead. From there, you’ll be able to start from a template or create a custom build from scratch.
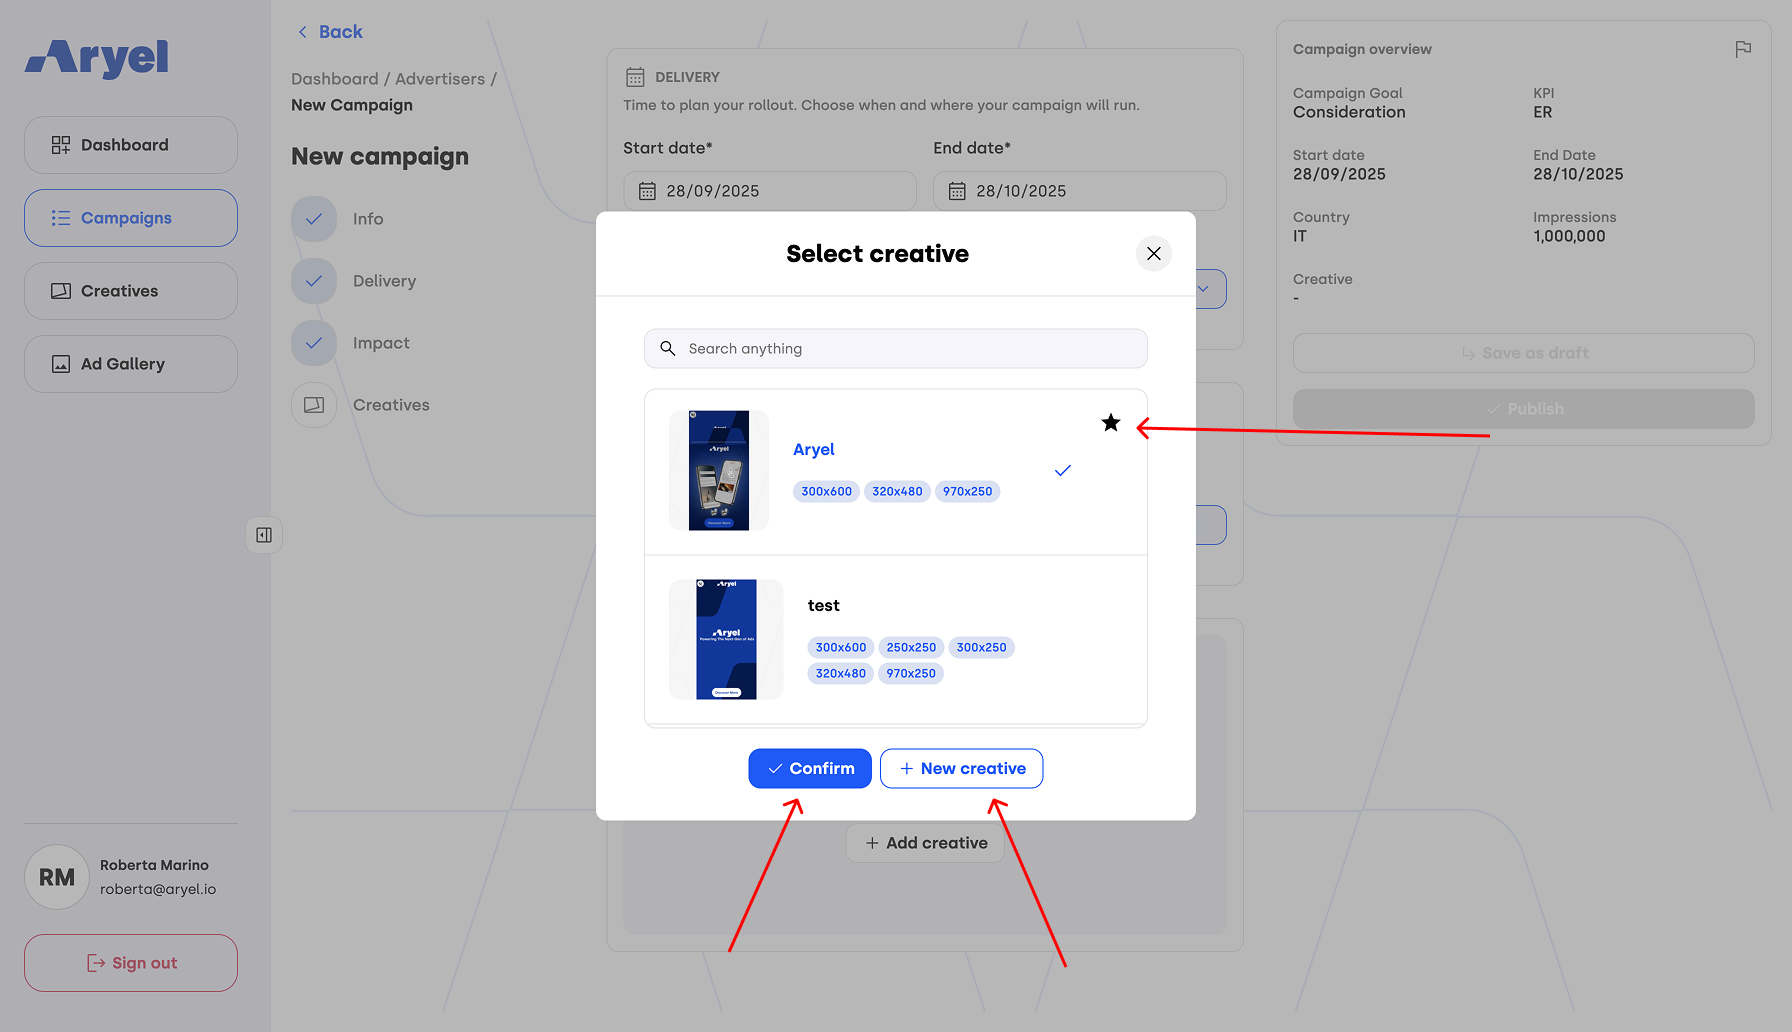
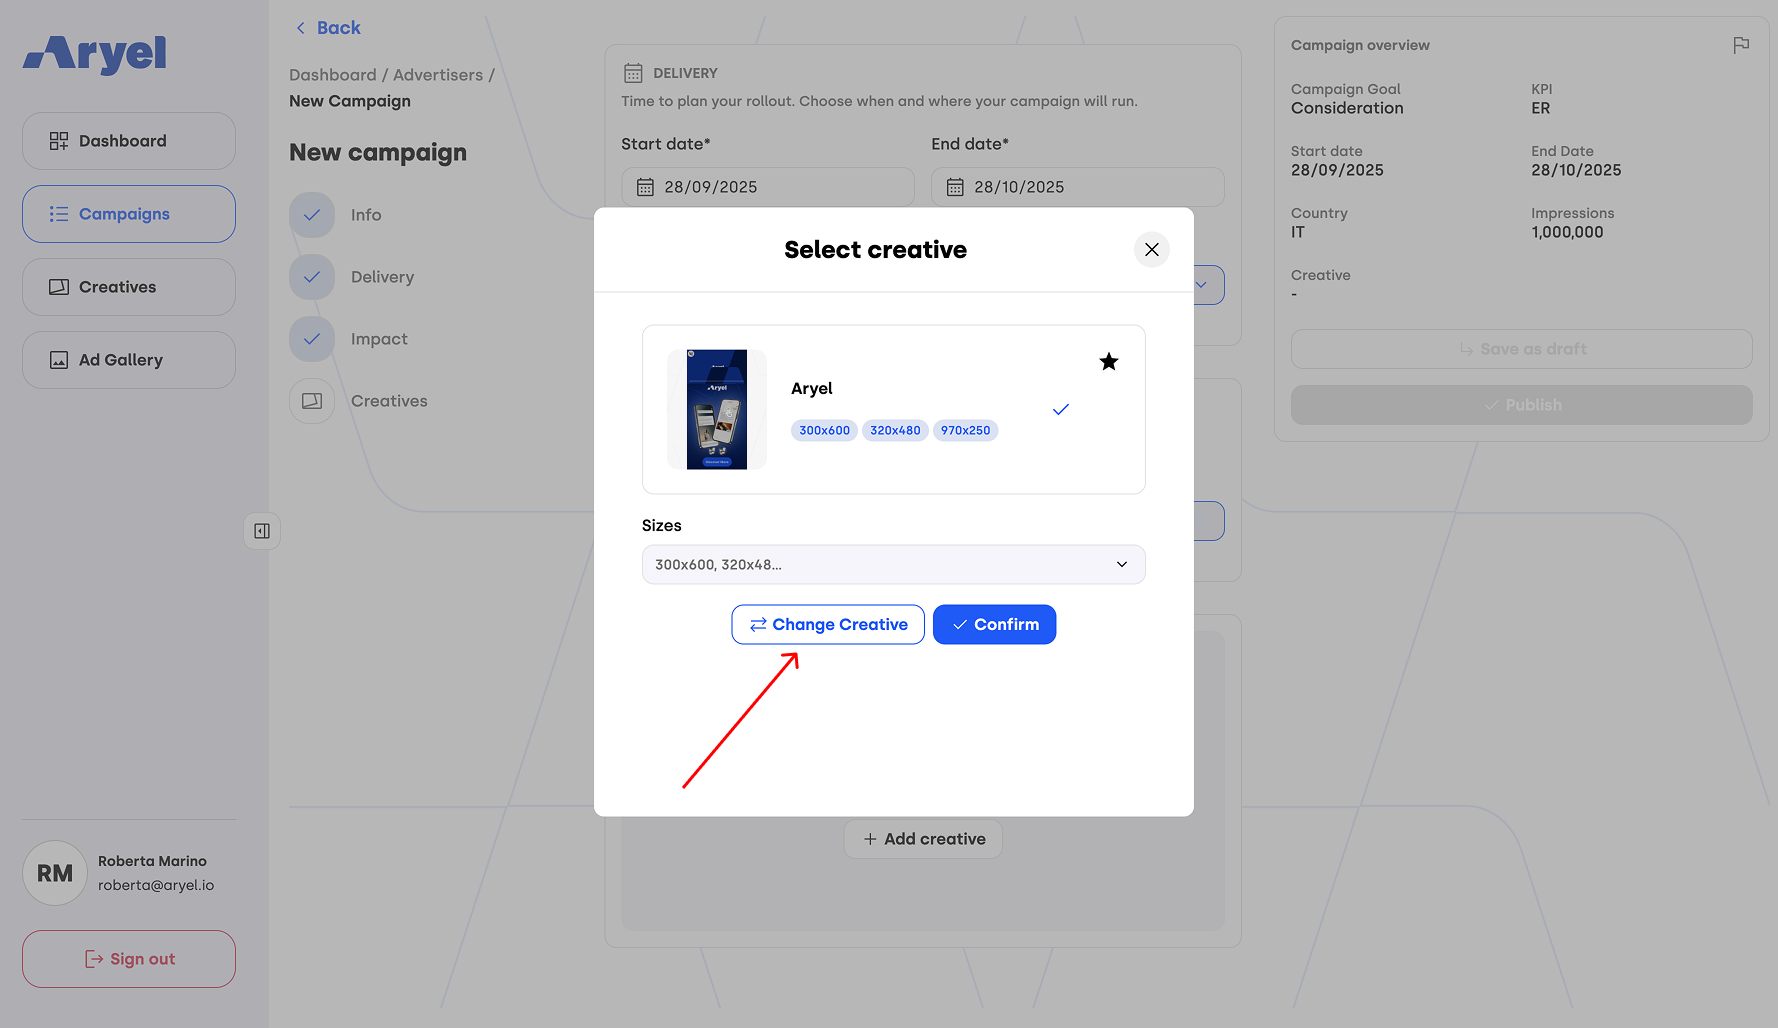
After selecting a creative, choose the sizes that are relevant for your campaign from the list of supported sizes. Once confirmed, the creative will be linked to your campaign.
If you change your mind, you can click the "Change Creative" button to select a different one.
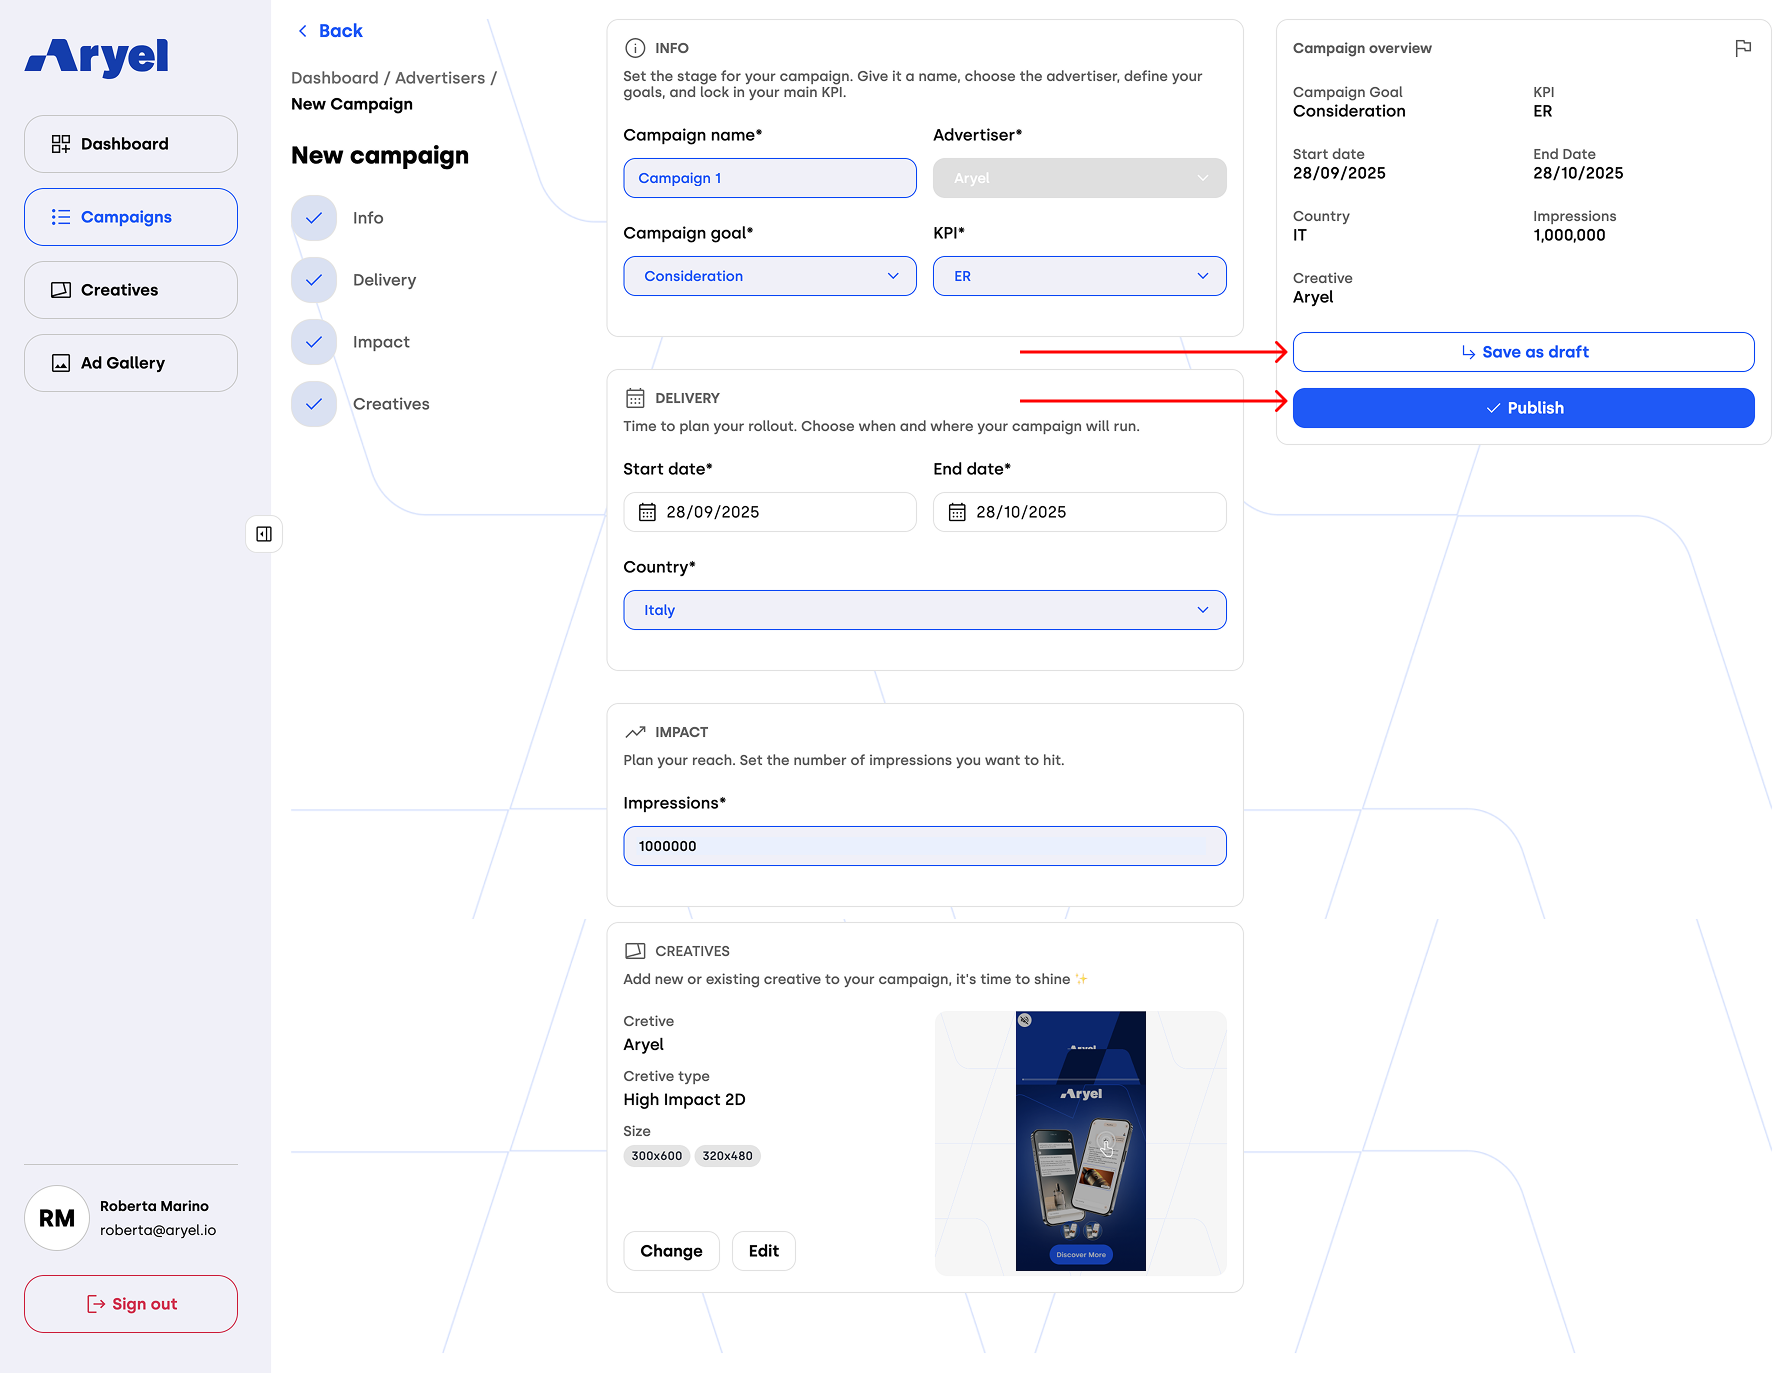
When all fields are completed and the creative is linked, you have two options:
Save as Draft: The campaign will appear in the advertiser’s campaign list but remains editable.
Publish: The campaign will move to Ready status.
Once published, you can head over to the Setup tab inside the Flight Detail Page, where you'll find a button labeled Tag Settings on the row of each tag created (the number of tags will match the number of selected sizes when linking the creative).
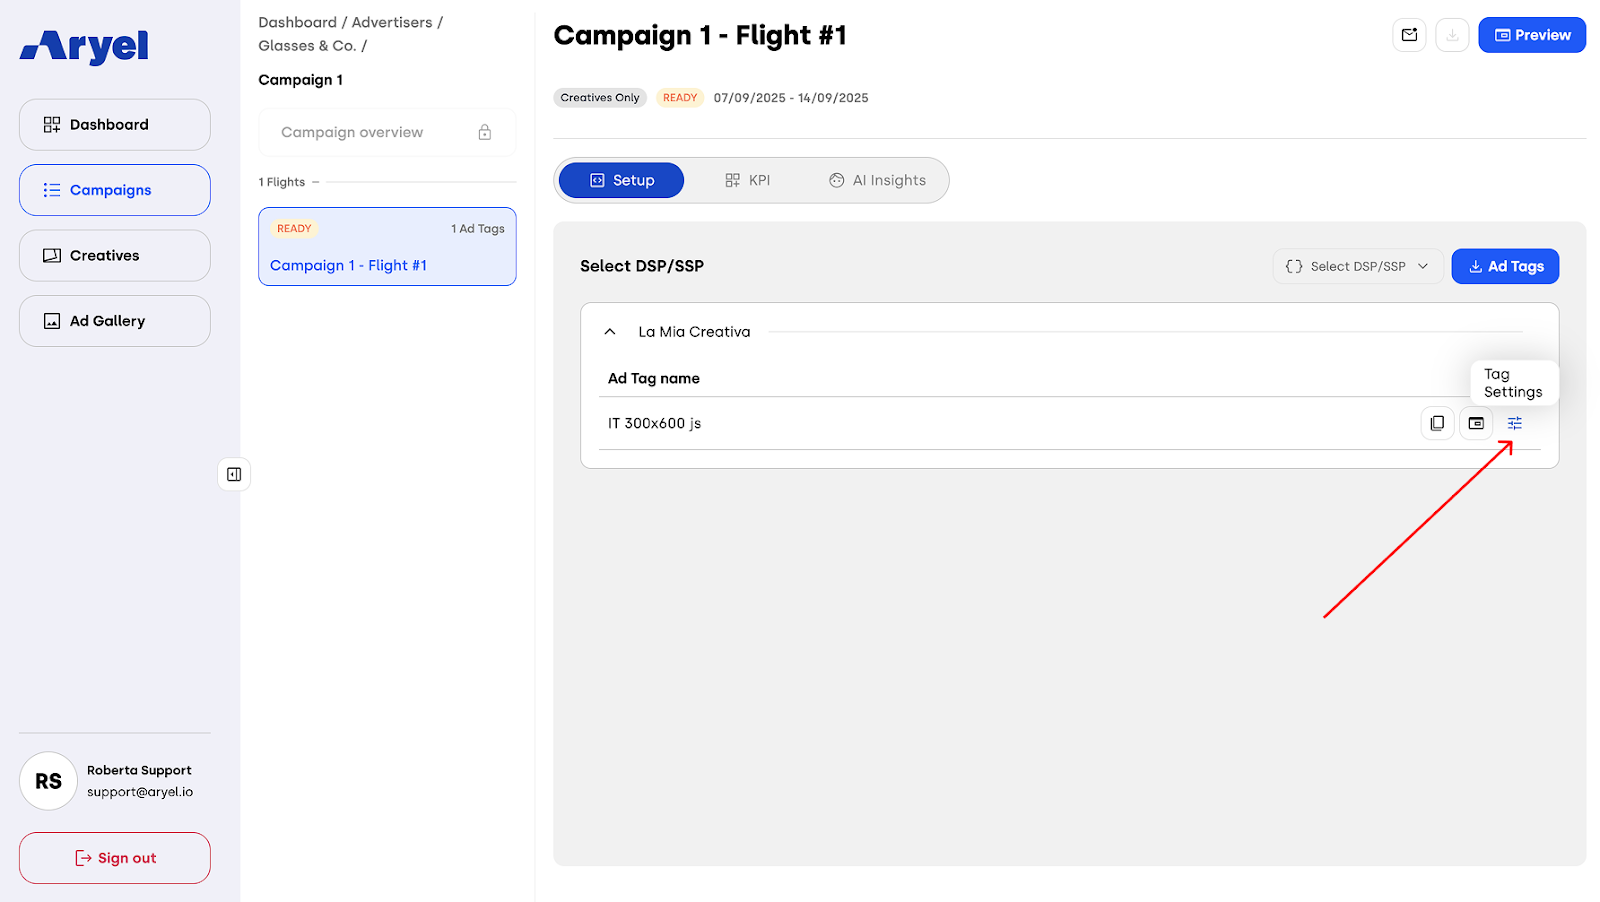
Clicking this button opens a dropdown menu with the following options: Settings, Duplicate, and Rename. By selecting Settings, a modal will open. The structure of this modal differs based on the type of creative linked:
Standard Creative Settings (Non-VAST)
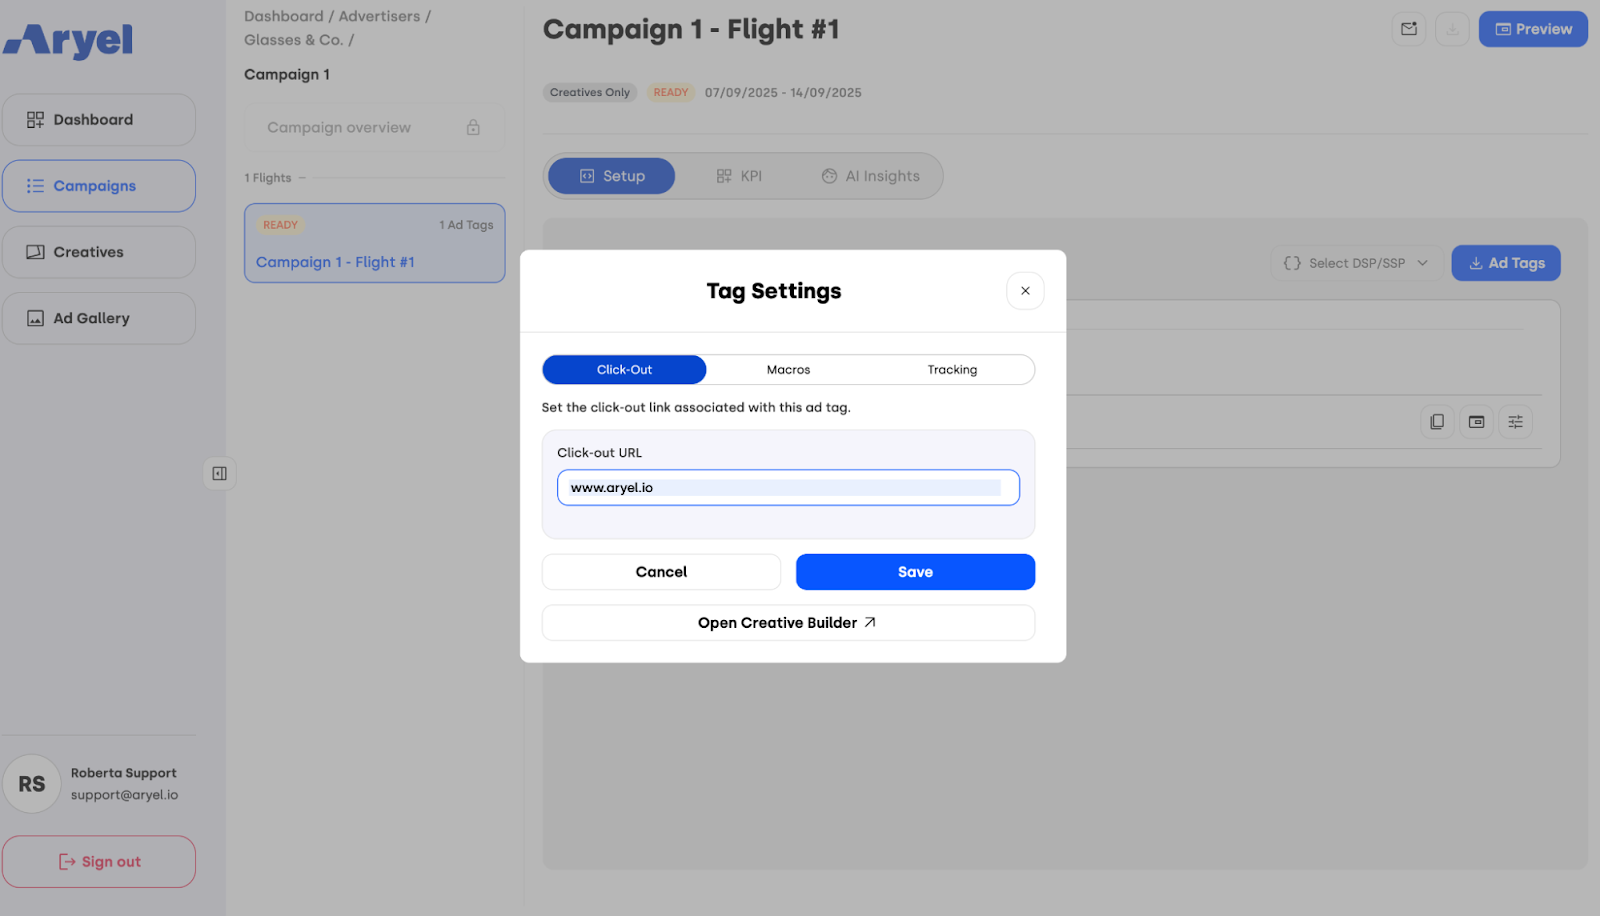
For standard display or rich media creatives, the modal is divided into three sections:
Click-Out: This is where you’ll enter the destination URL the tag should point to.
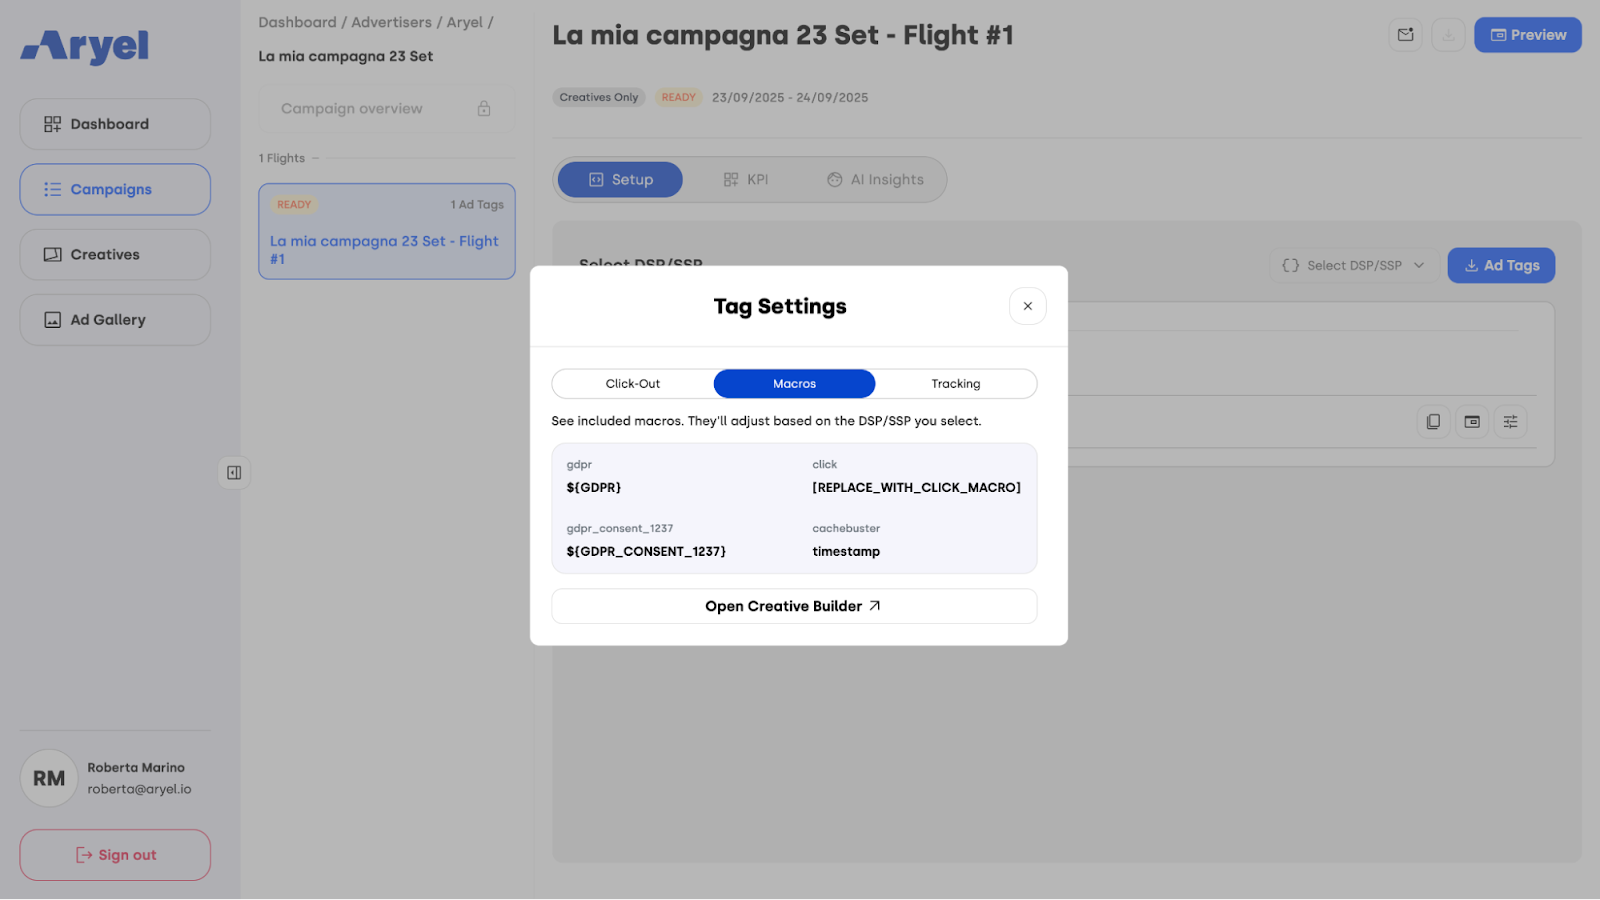
Macros: This section lists all the available macros that will be included in the .txt file upon tag download.
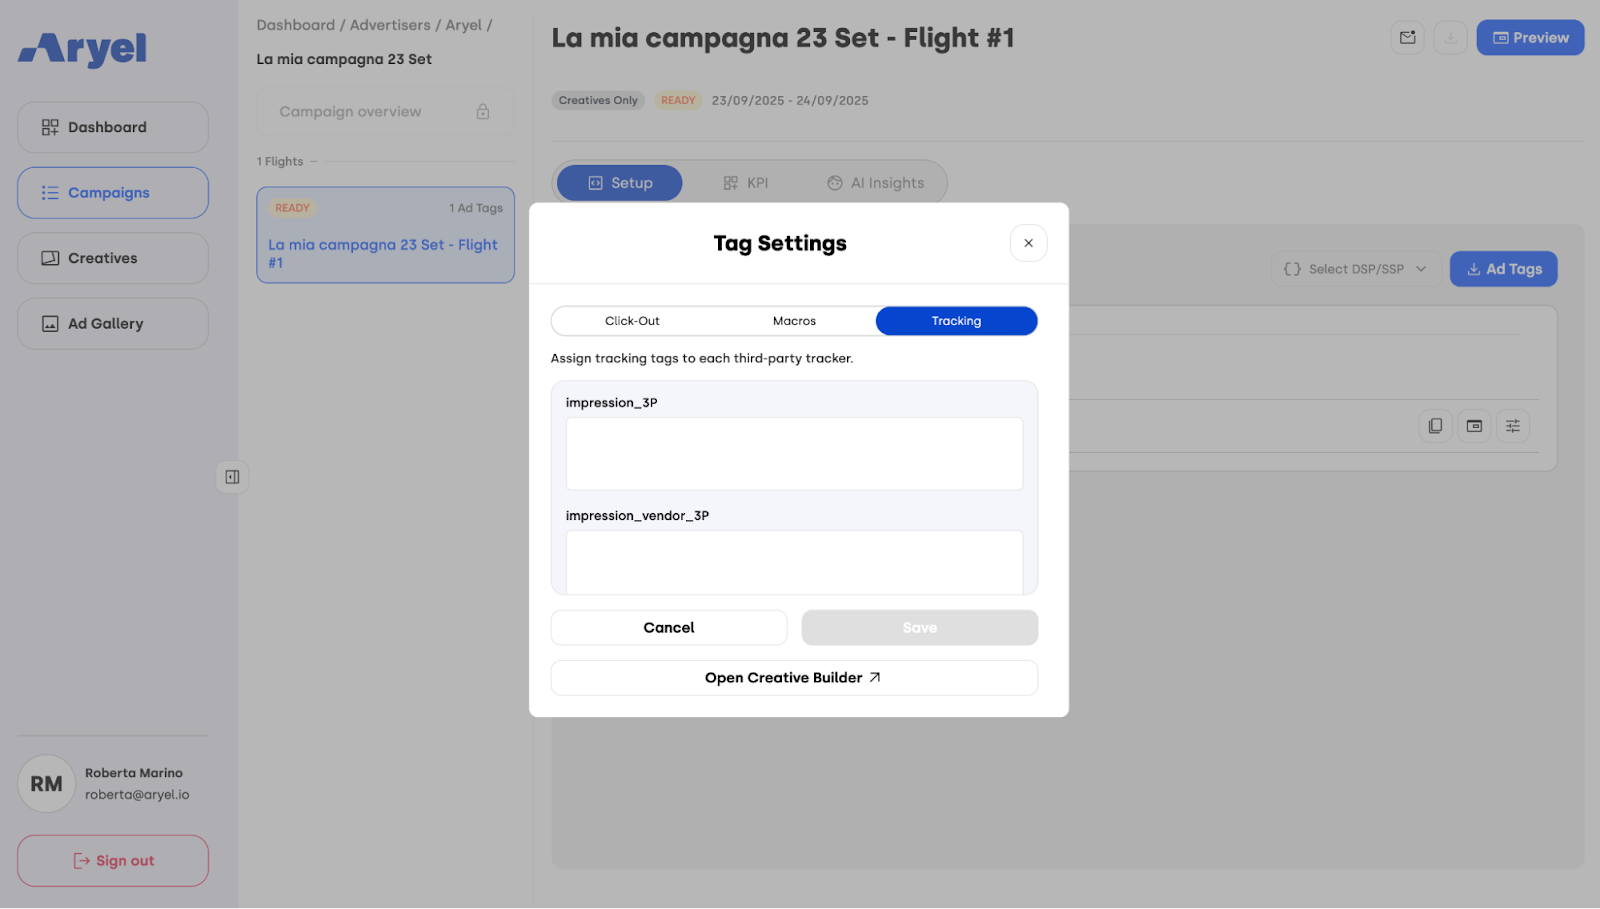
Tracking: Here you can see all third-party trackers previously added in the Ads Manager Builder and also add additional third-party tags.
After entering the click-out URL, click Save to confirm your changes.
VAST Creative Settings
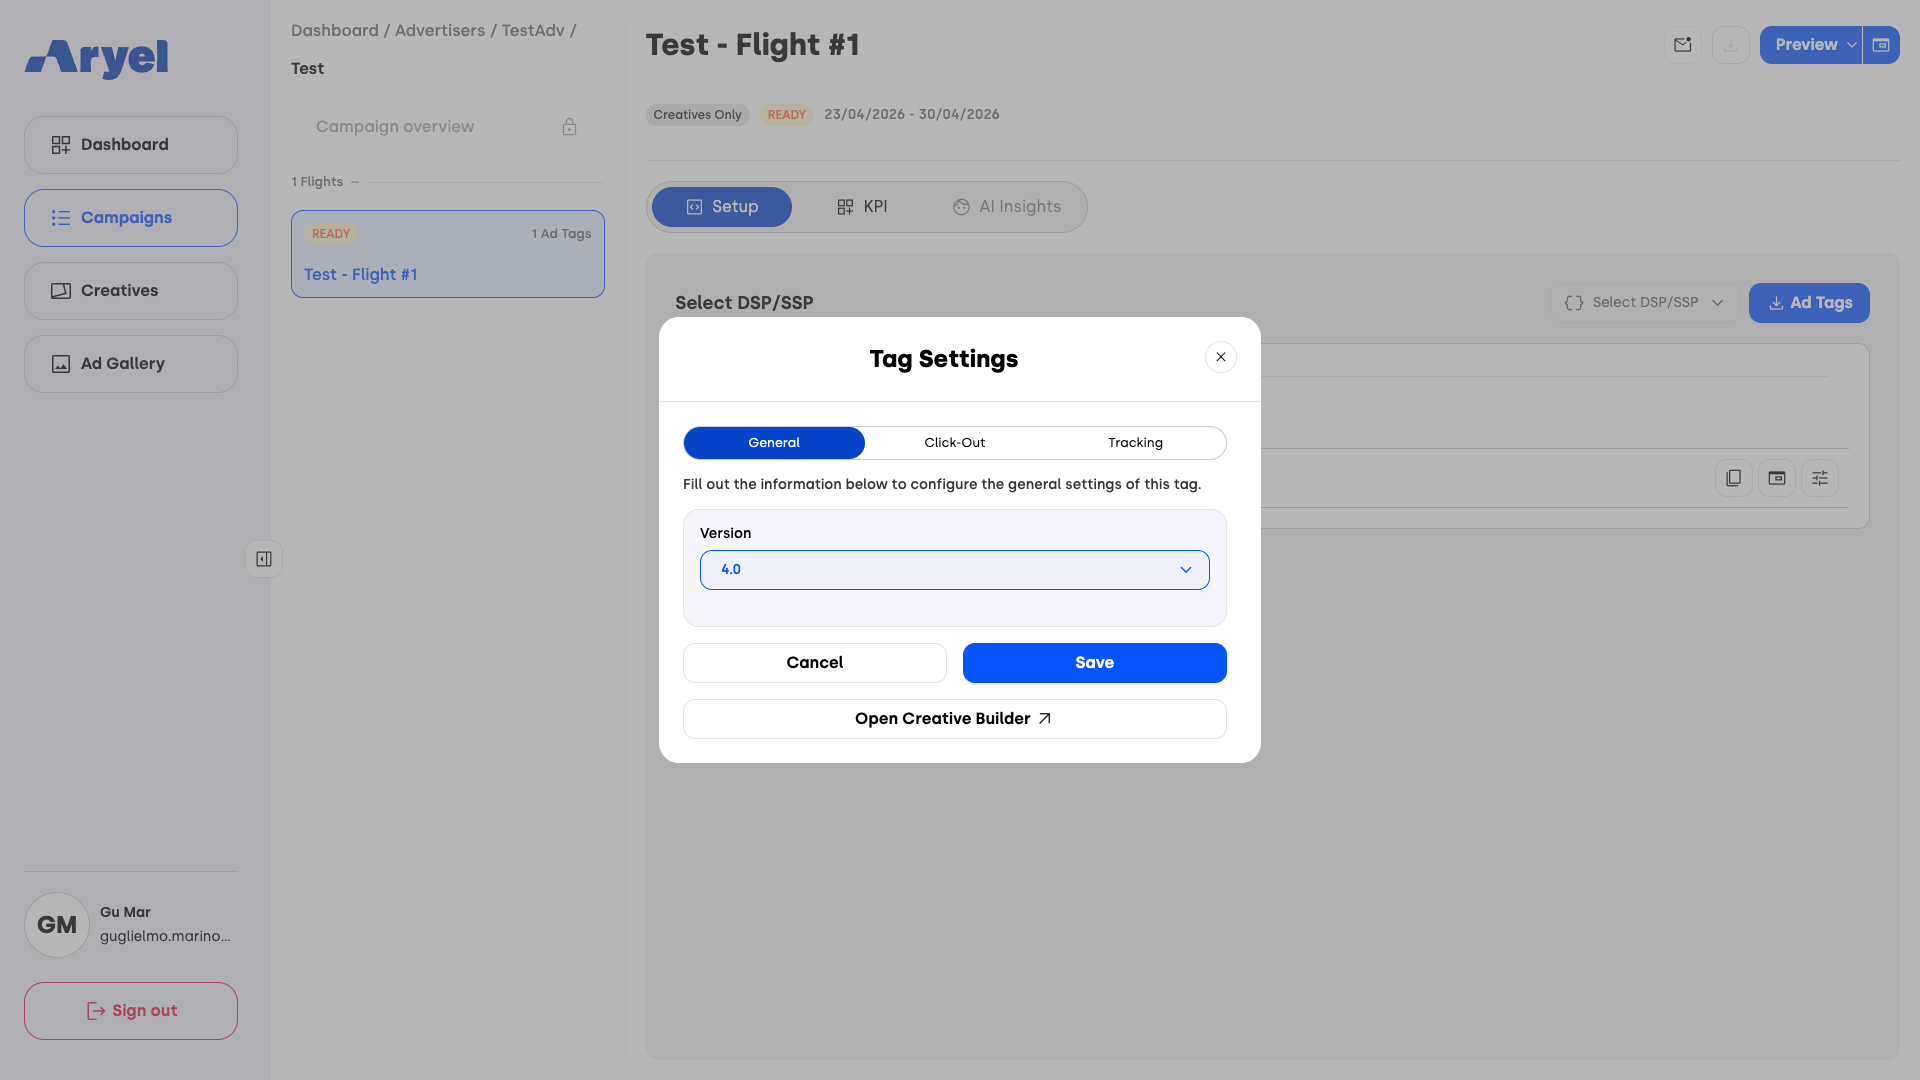
If the linked creative is a VAST (Video Ad Serving Template), the modal is structured into three specific sections:
General: Here you can select the VAST version. If no version is manually selected, the system will apply the default version (4.1).
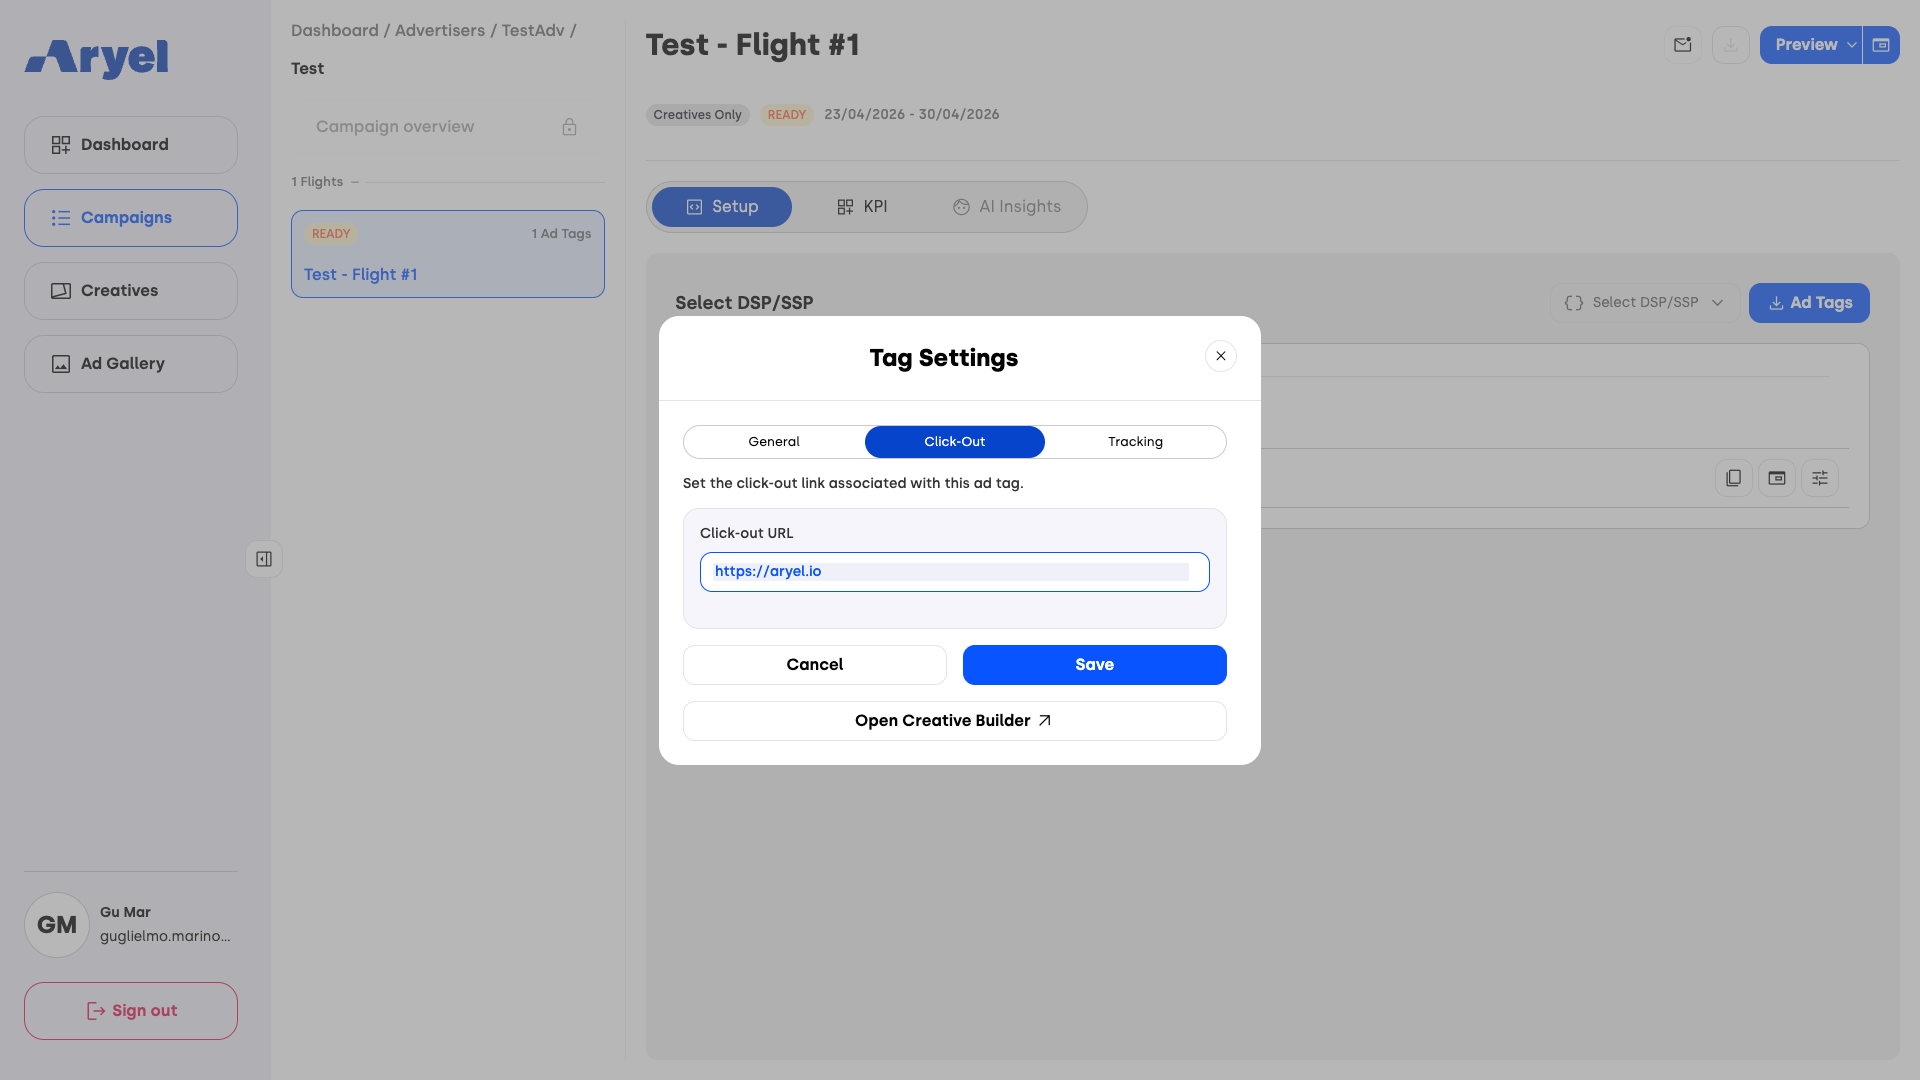
Click-Out: Enter the destination URL for the video redirect.
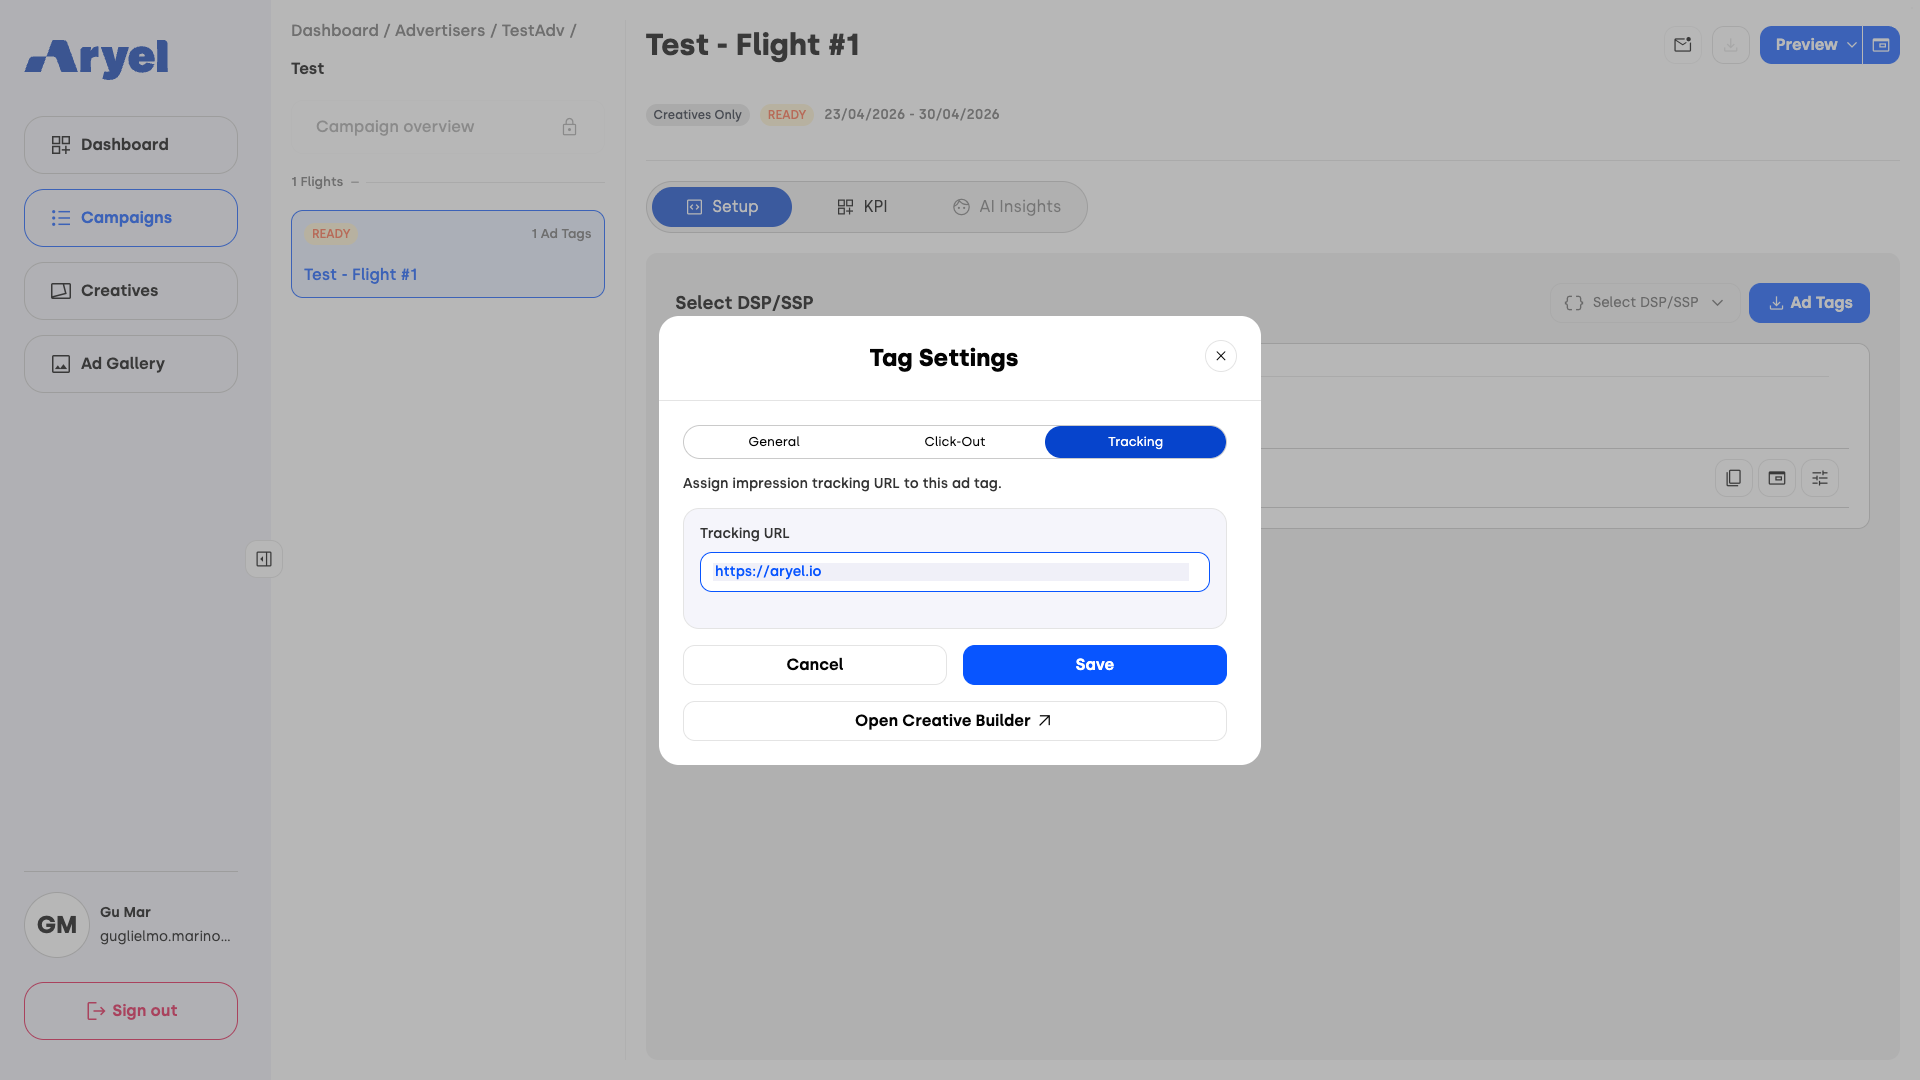
Tracking: Assign the impression tracking URL specifically to this ad tag.
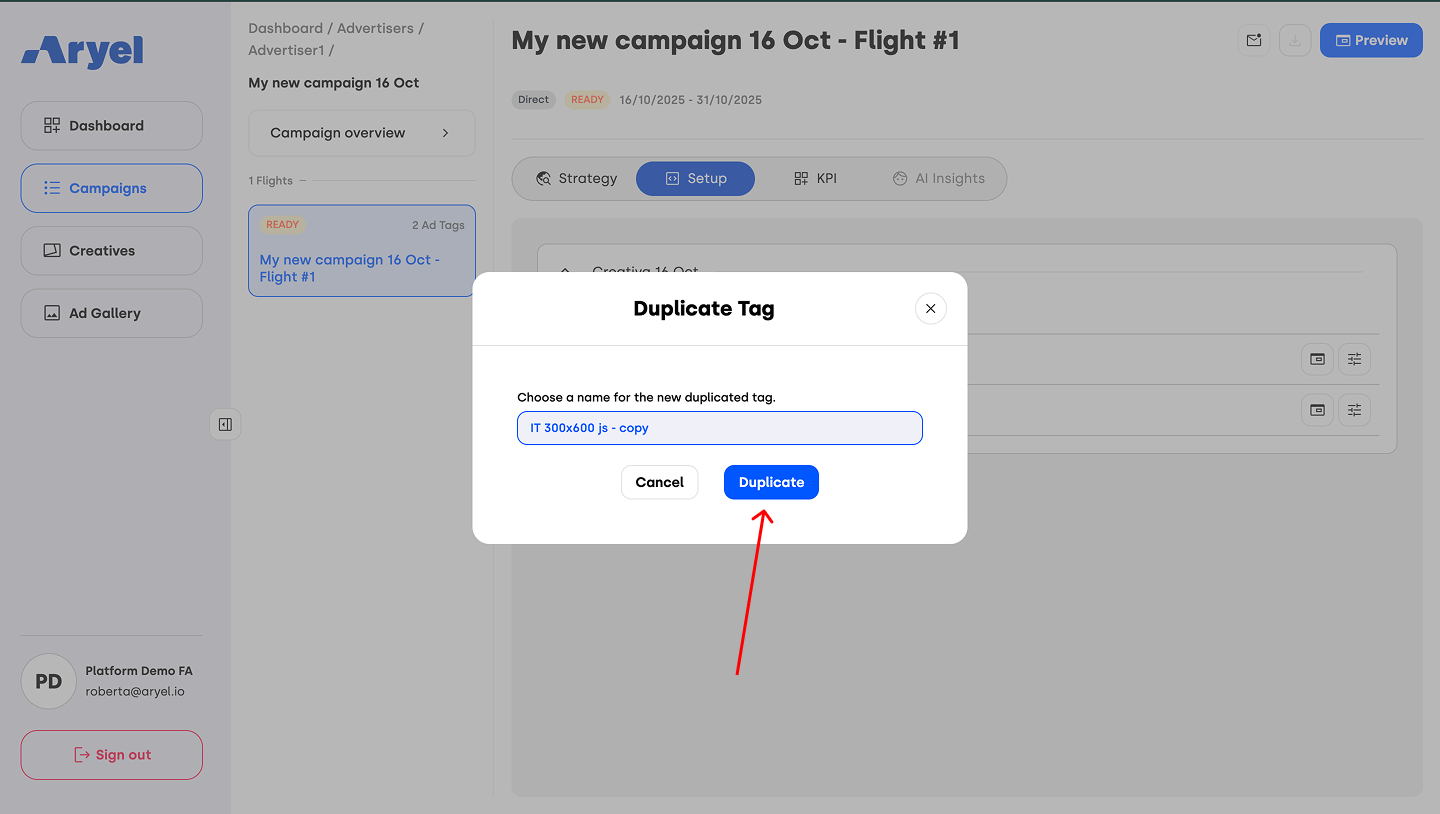
By selecting Duplicate from the options, a modal will appear allowing you to assign a name to the new duplicated tag. Once confirmed, the system generates a new instance identical to the original. This option is particularly useful if you need to assign different tracking tags or click-out URLs while maintaining the same creative content and sizes.
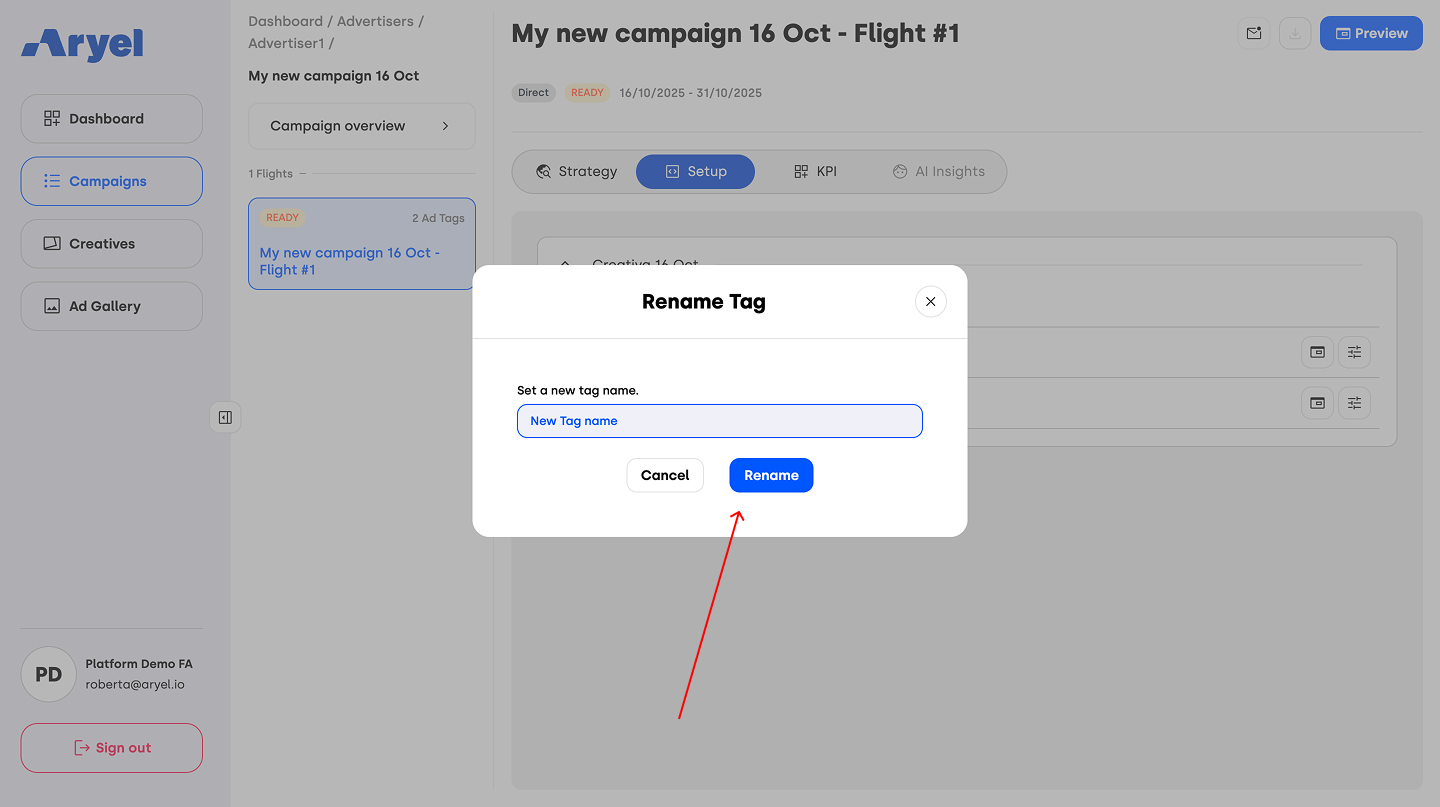
Additionally, by selecting the Rename option from the dropdown, you can simply rename the tag using a name that is more useful for your needs.
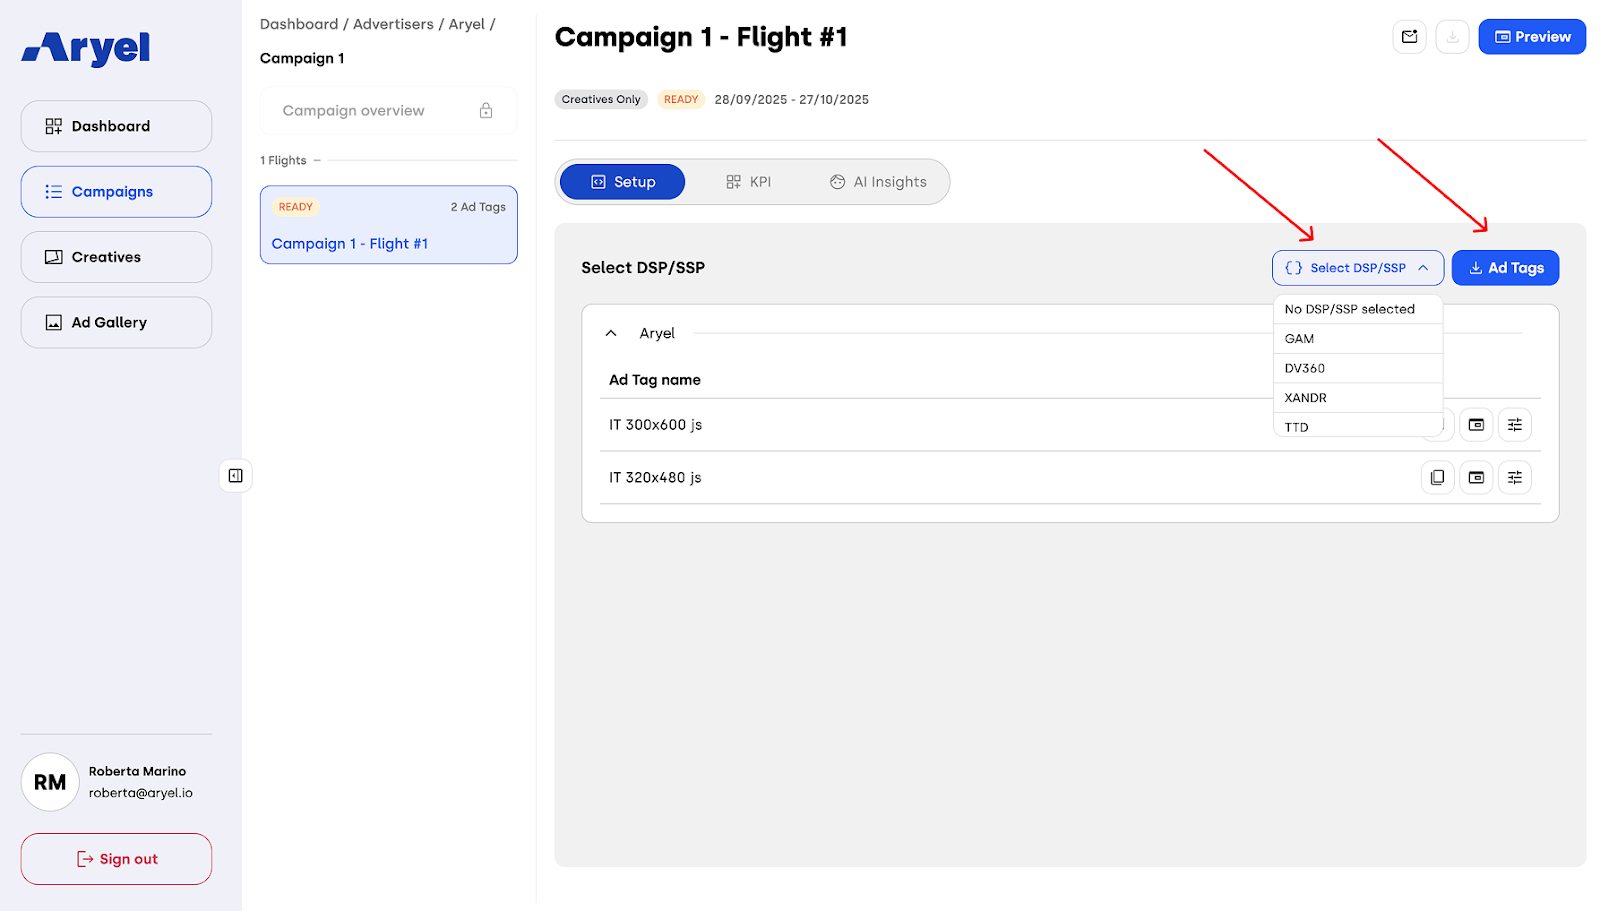
Once the tag setup is completed, all that’s left is to select the DSP on which the tags will be served and download them, ready to be uploaded and activated on your chosen DSP.
This completes the entire workflow — from campaign creation all the way to downloading the tags, making your campaign ready for delivery.