
Pages are the space where you organize and structure your ad by placing all the components that bring it to life. It's essential to understand how to create and manage them efficiently.
When you create a new creative and access the Builder, in the left sidebar you’ll find a default page which is automatically generated.
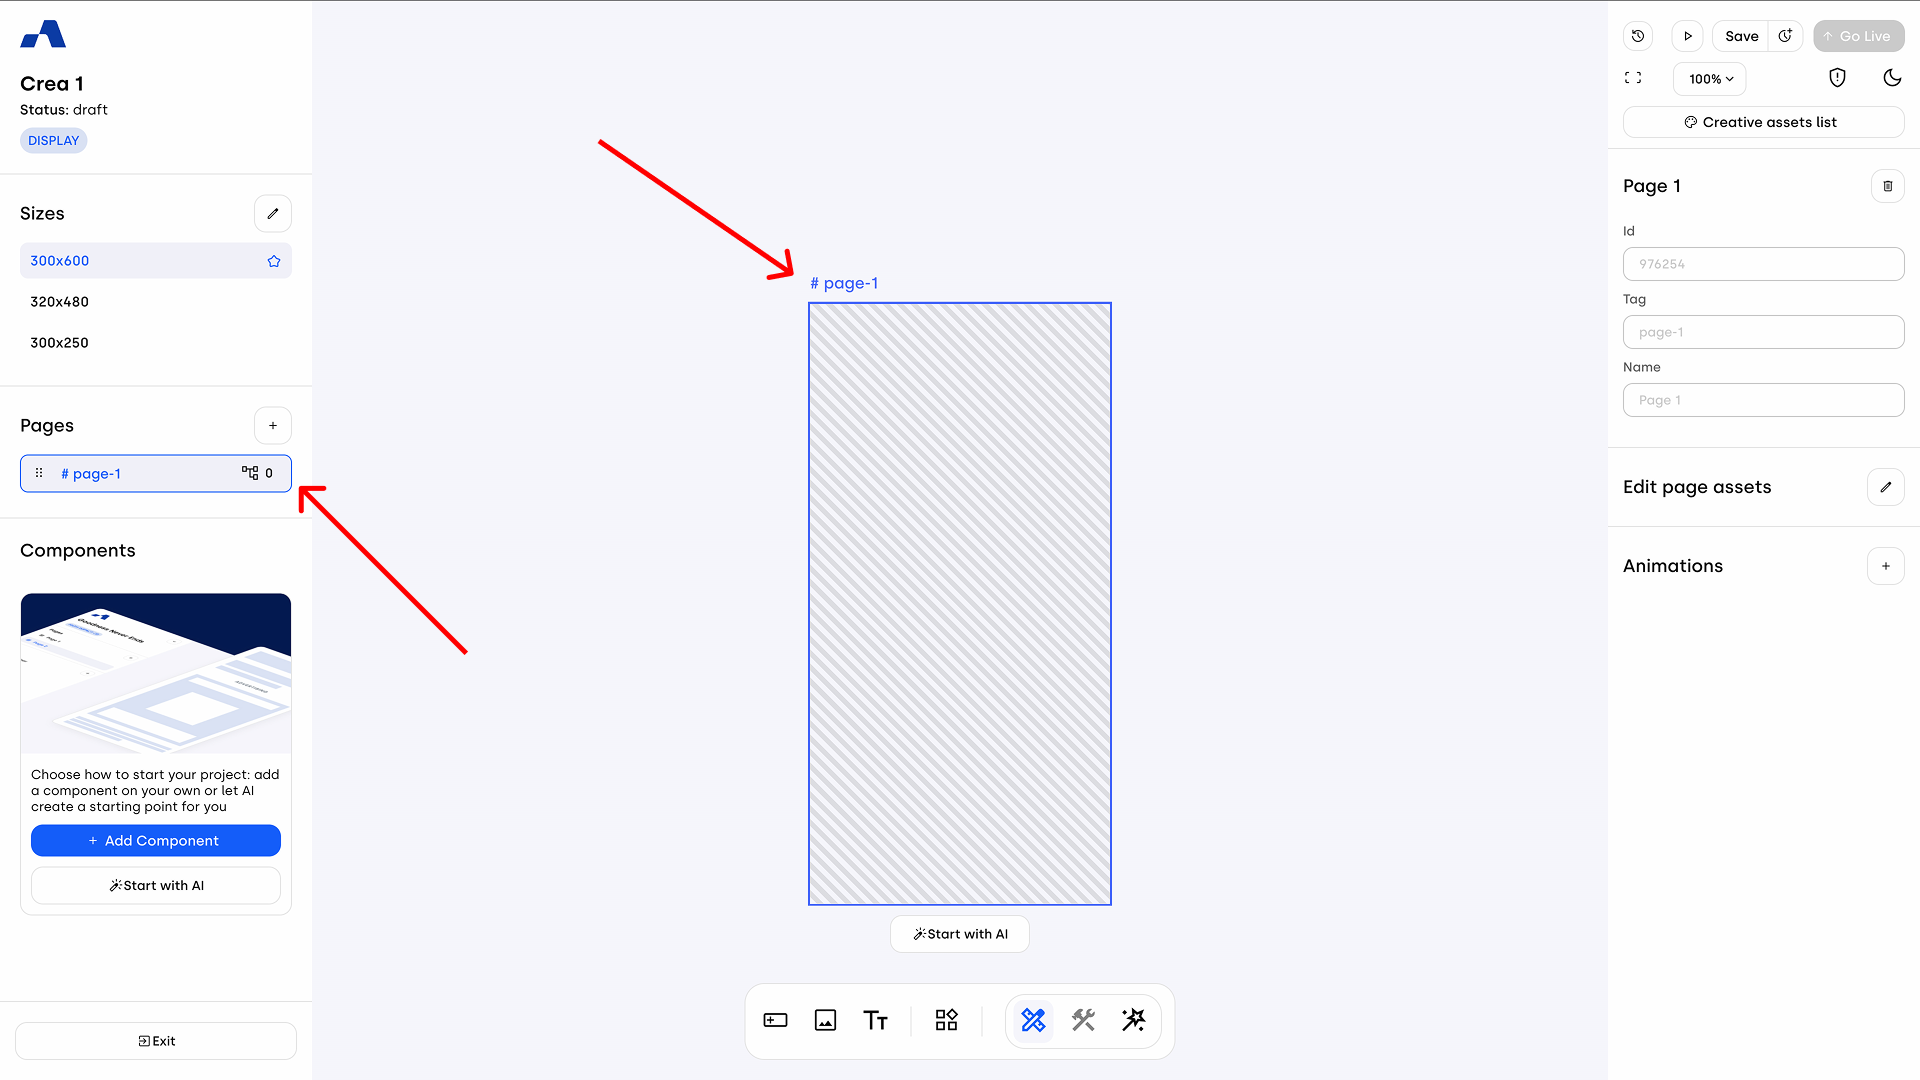
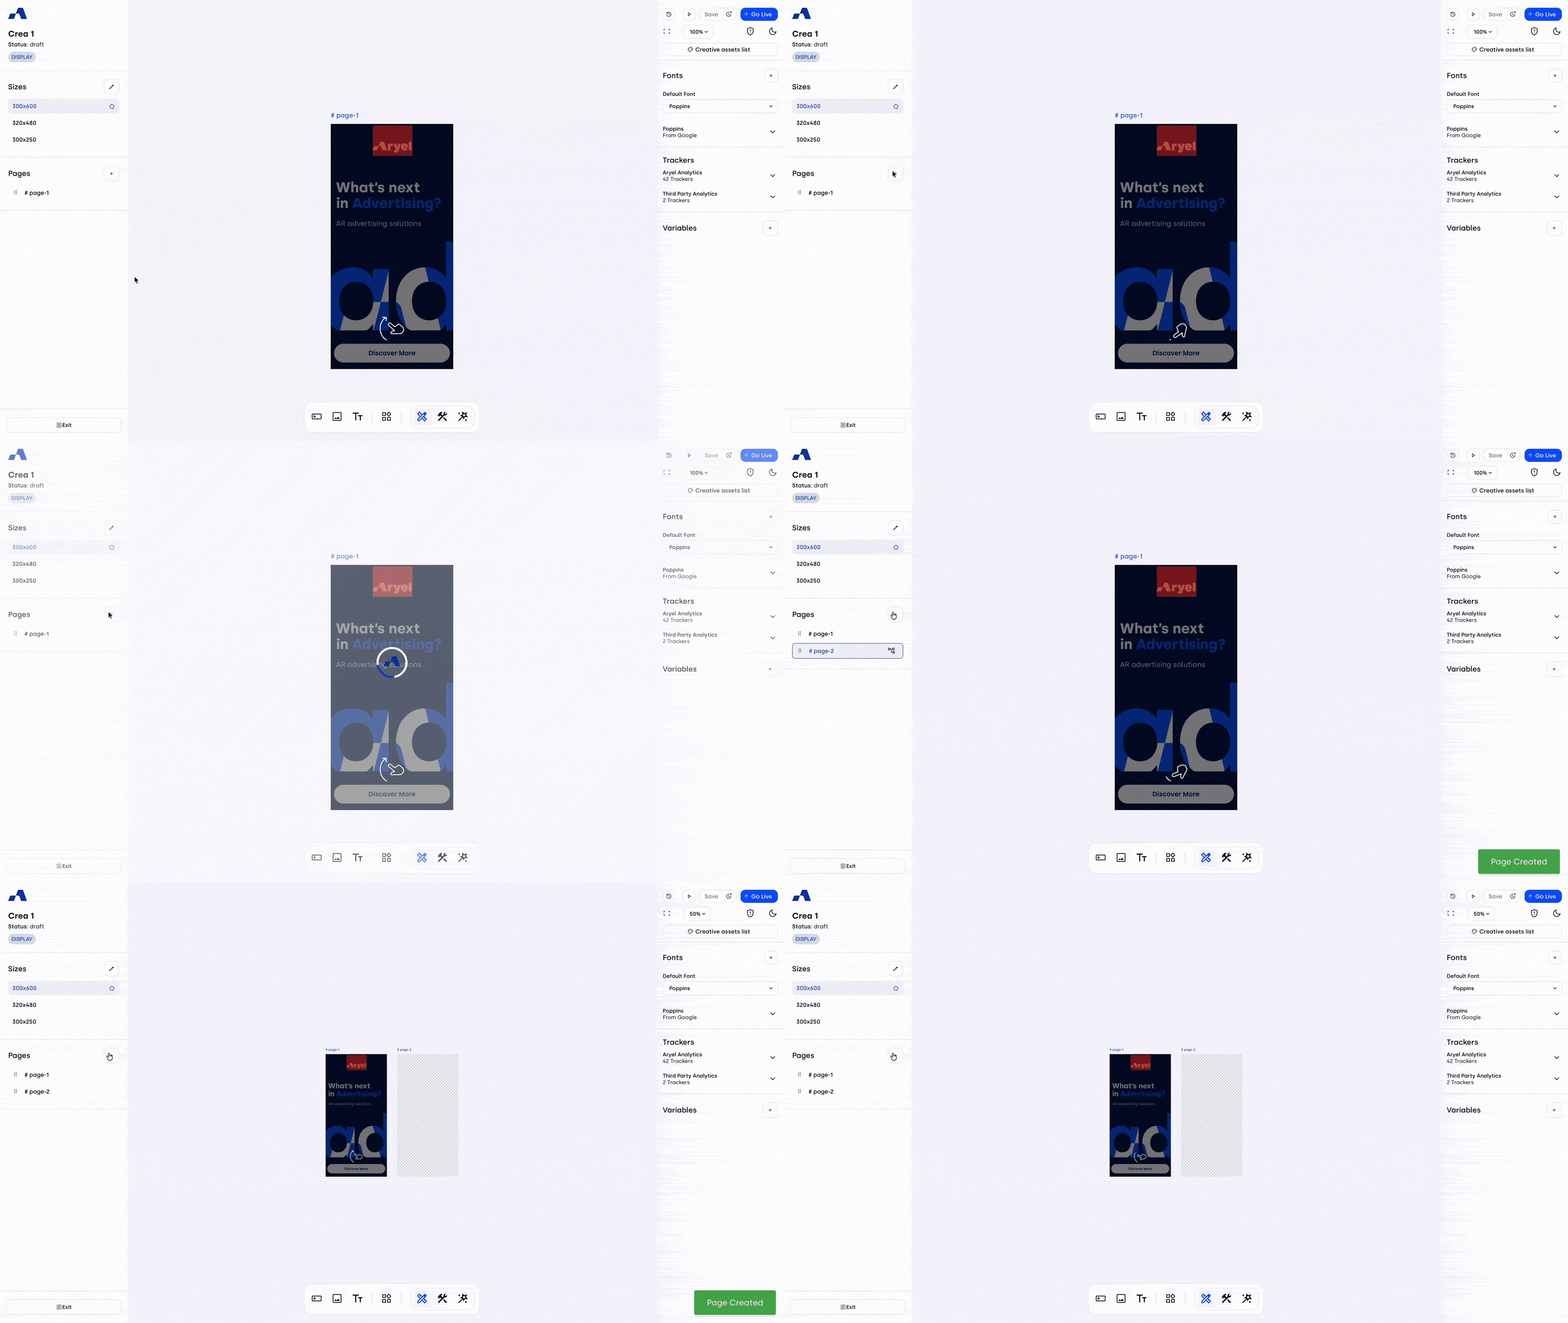
When using the Designer mode, you can add new pages, simply clicking the "+" button.
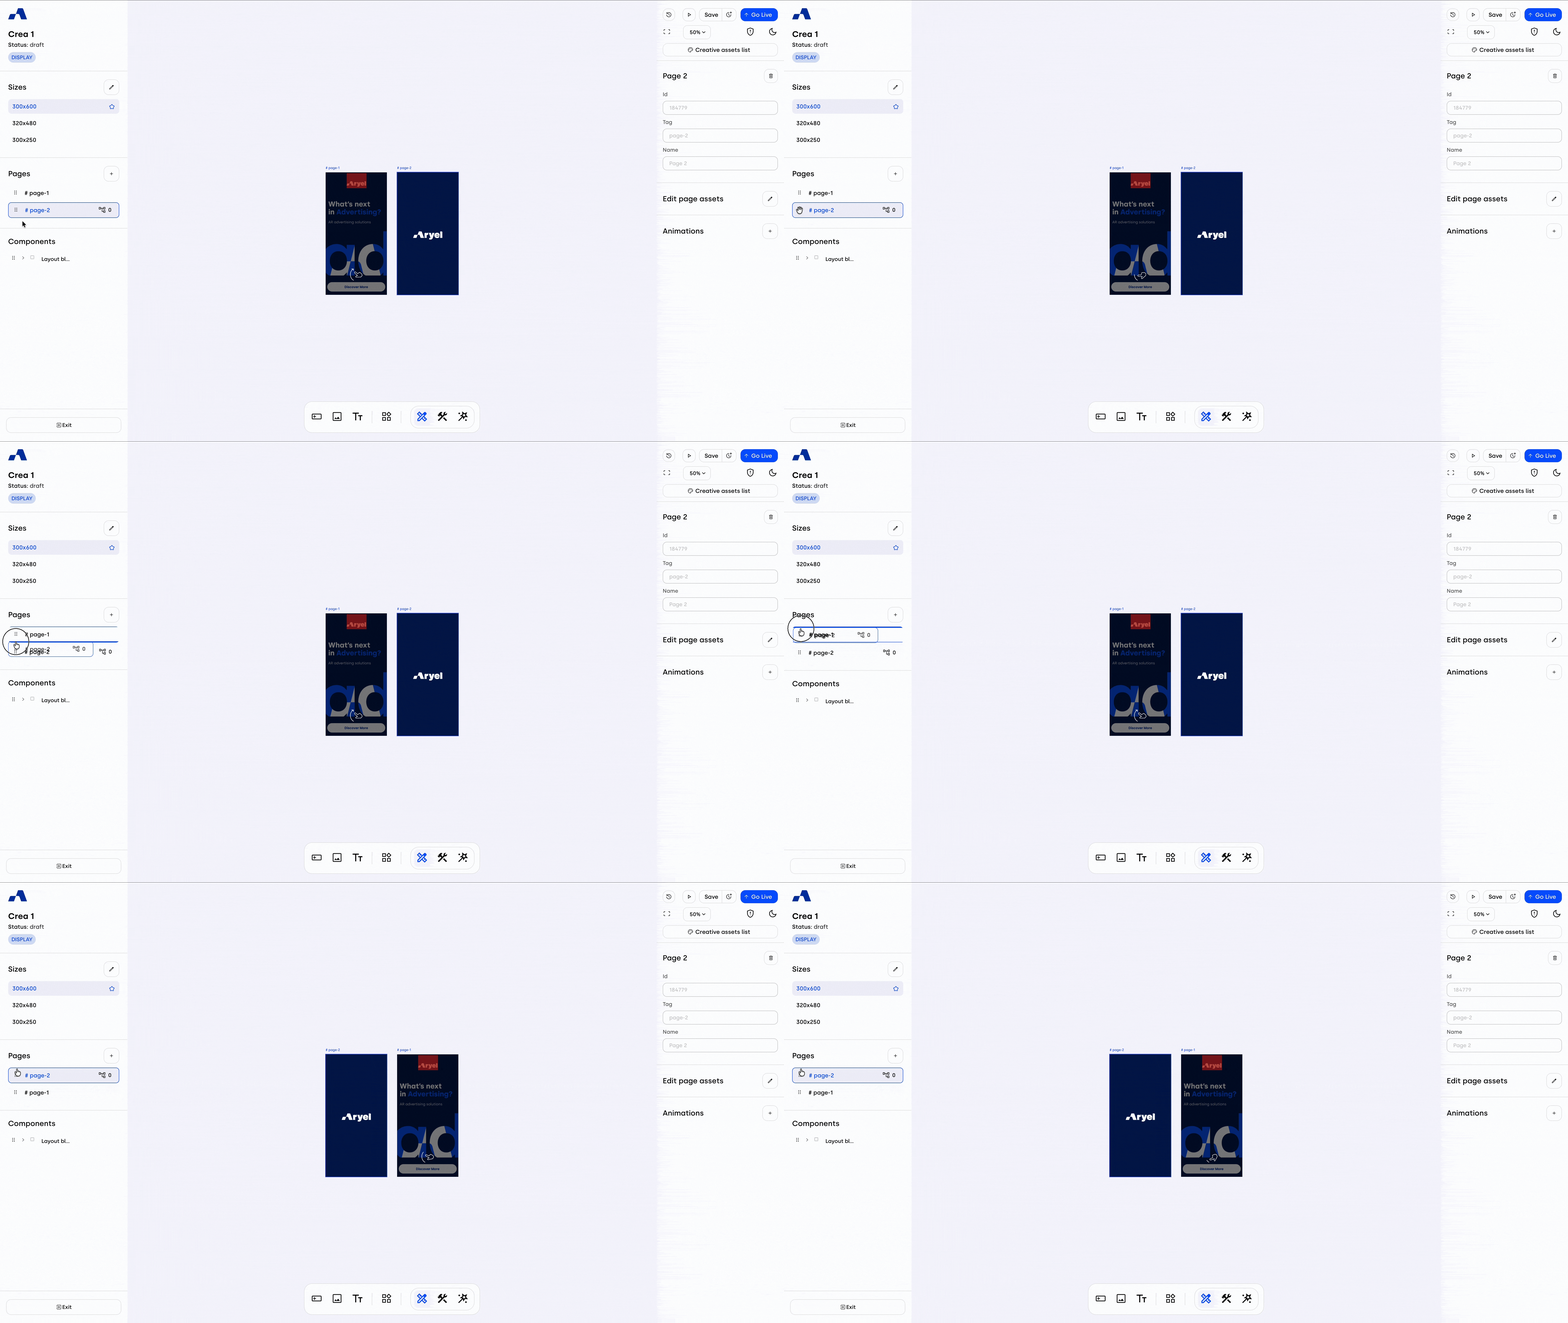
When multiple pages are present, you can reorder them according to your preferred structure. This also allows you to set as the first visible page one that you created at a later stage in the workflow, which is particularly useful when, for example, you want to add a cover page to your creative.
Clicking on a page entry in the left sidebar will automatically:
Select the page in the canvas
Display all components contained within it in the left sidebar
Update the right sidebar to show page's details
In the right sidebar, you can:
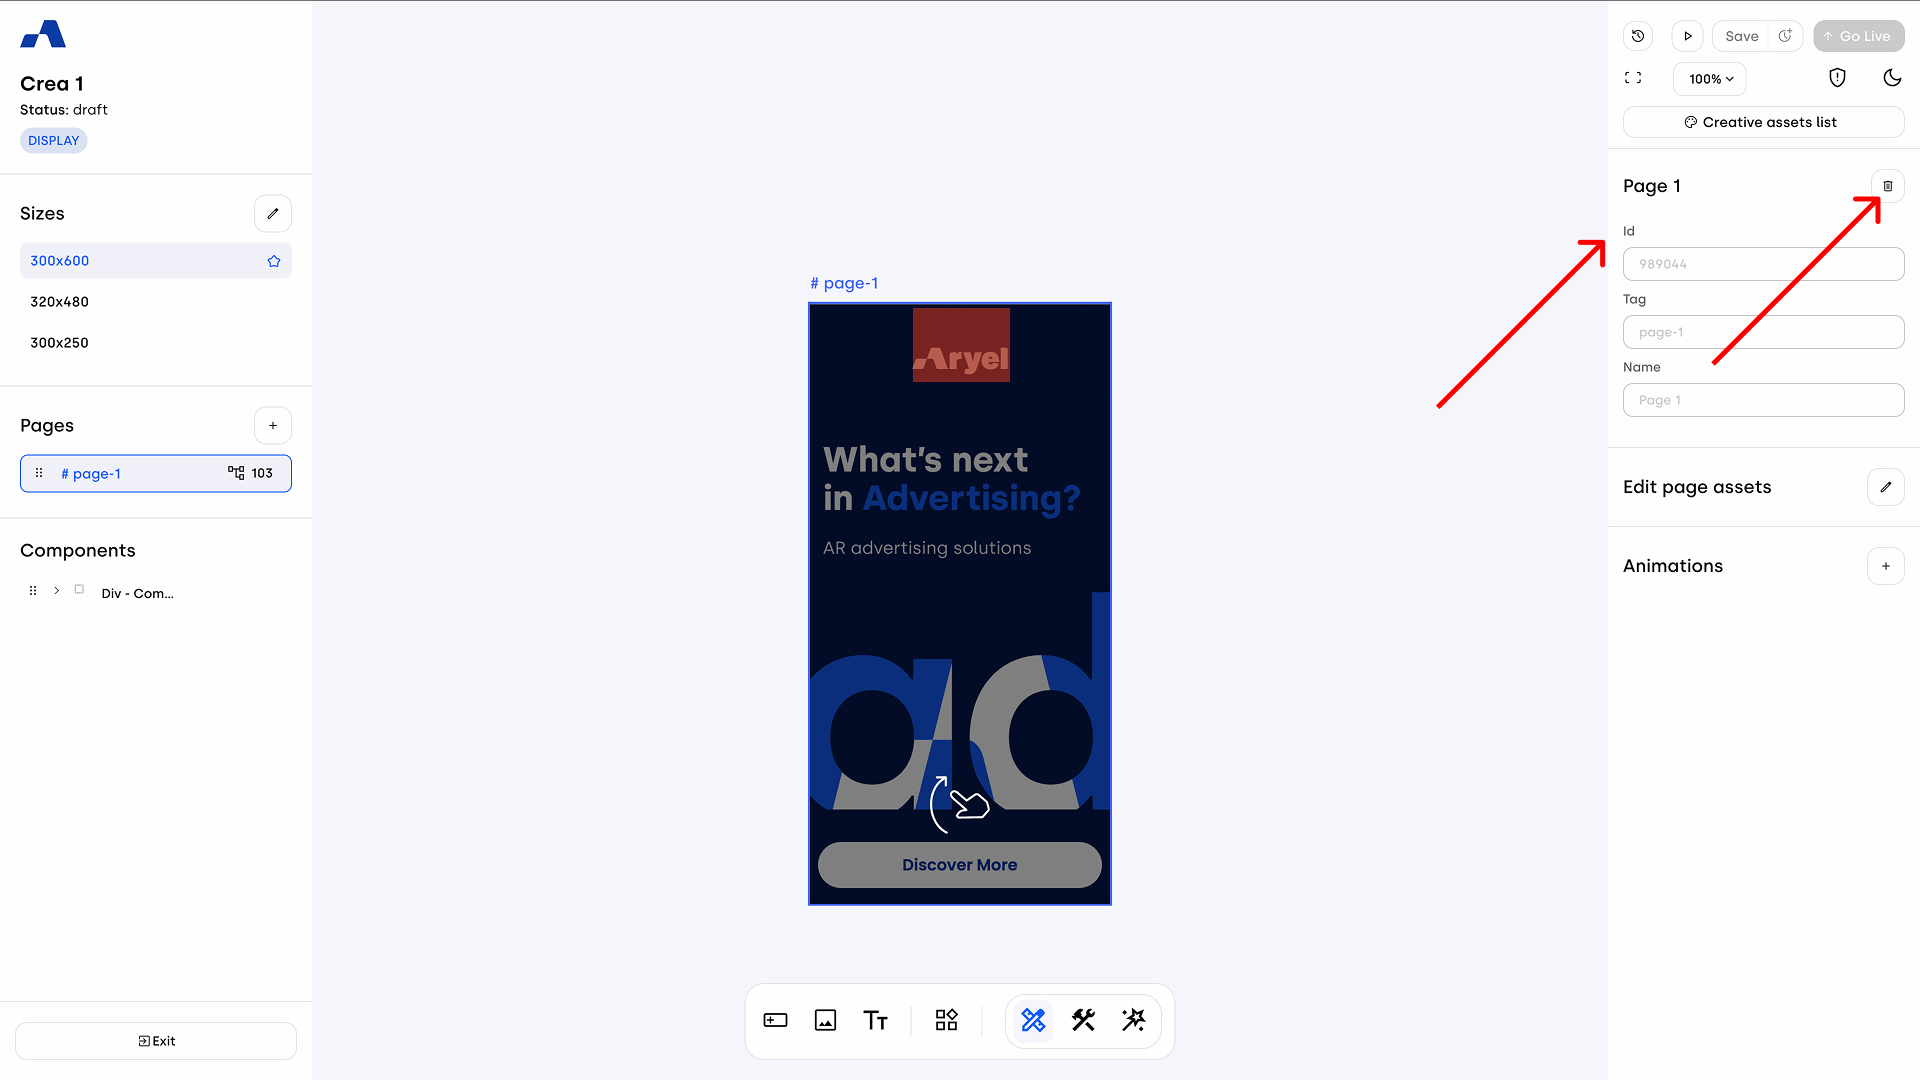
View the page ID, tag, and name.
Use the delete button to remove the page
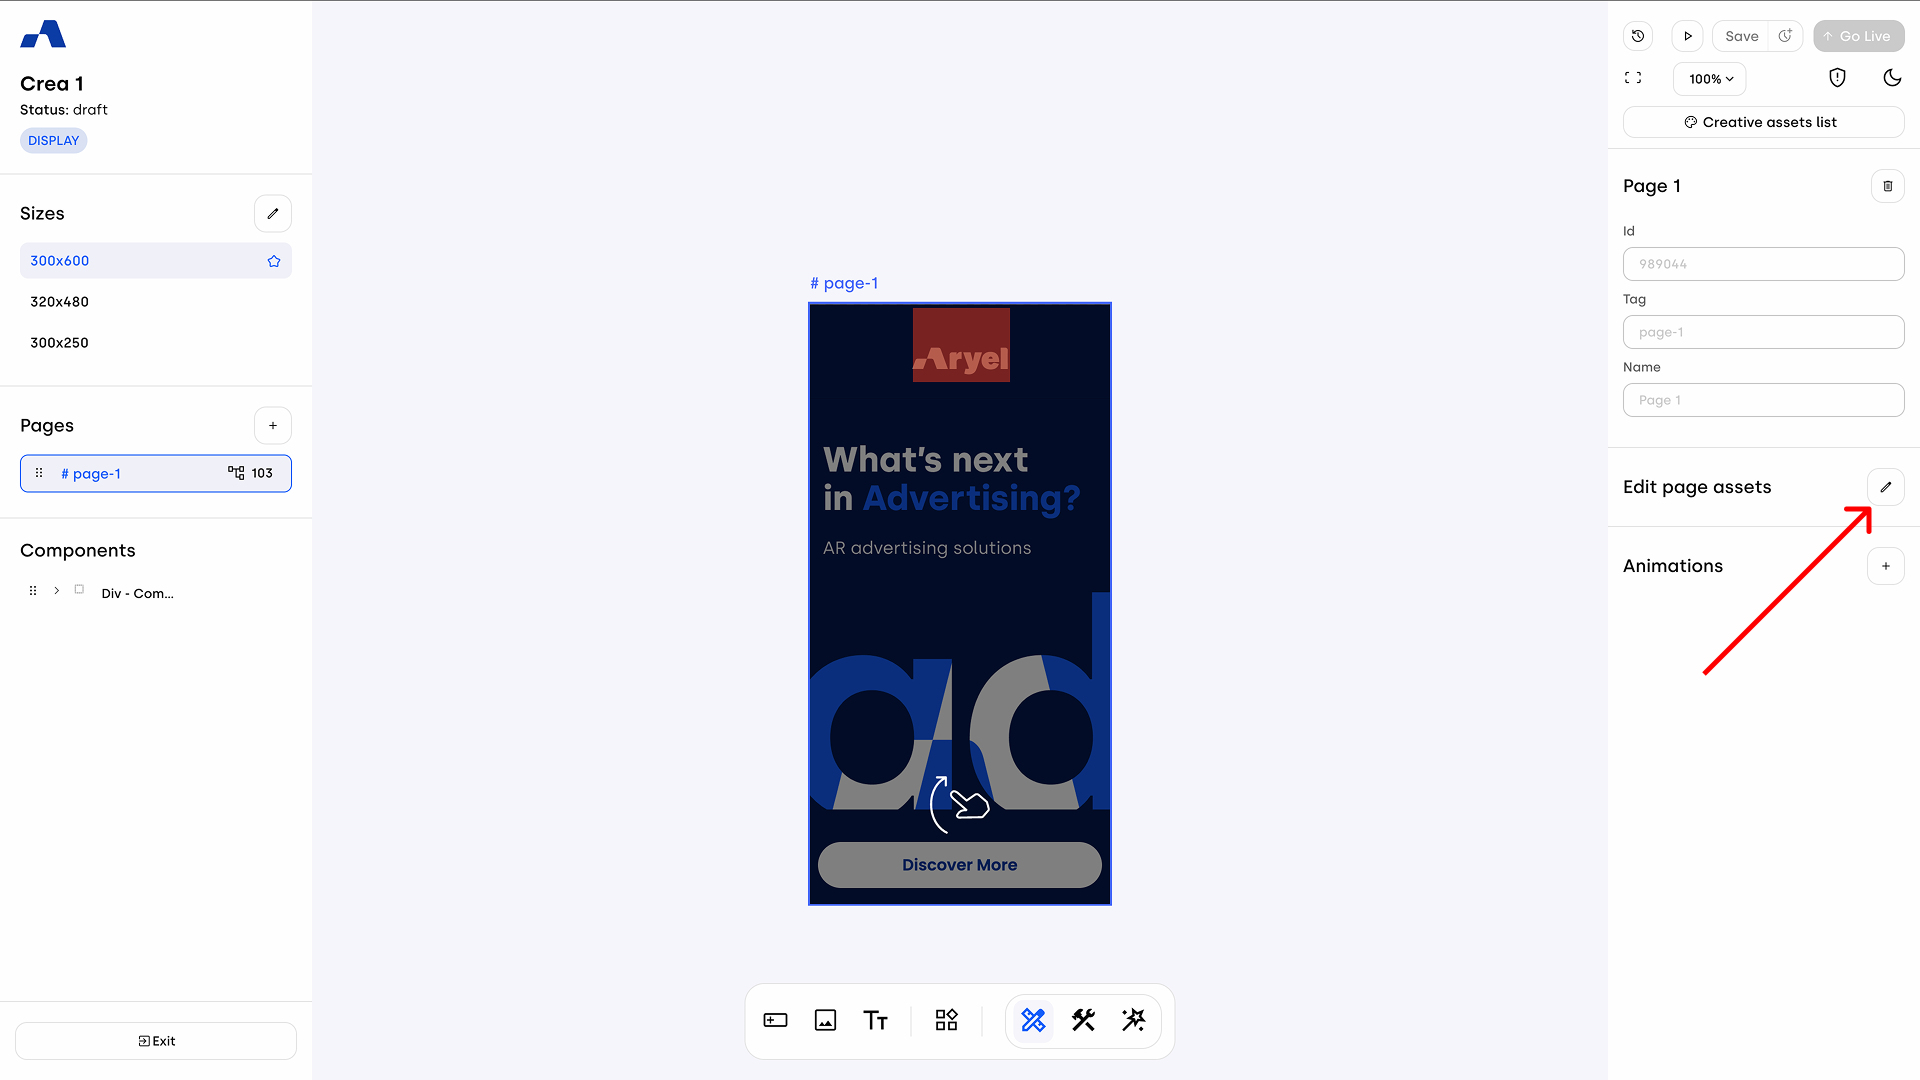
Just below the page details, you can manage the assets within the page by clicking on Edit Page Assets. Clicking the pencil icon opens a modal in the right sidebar displaying all the assets currently present.
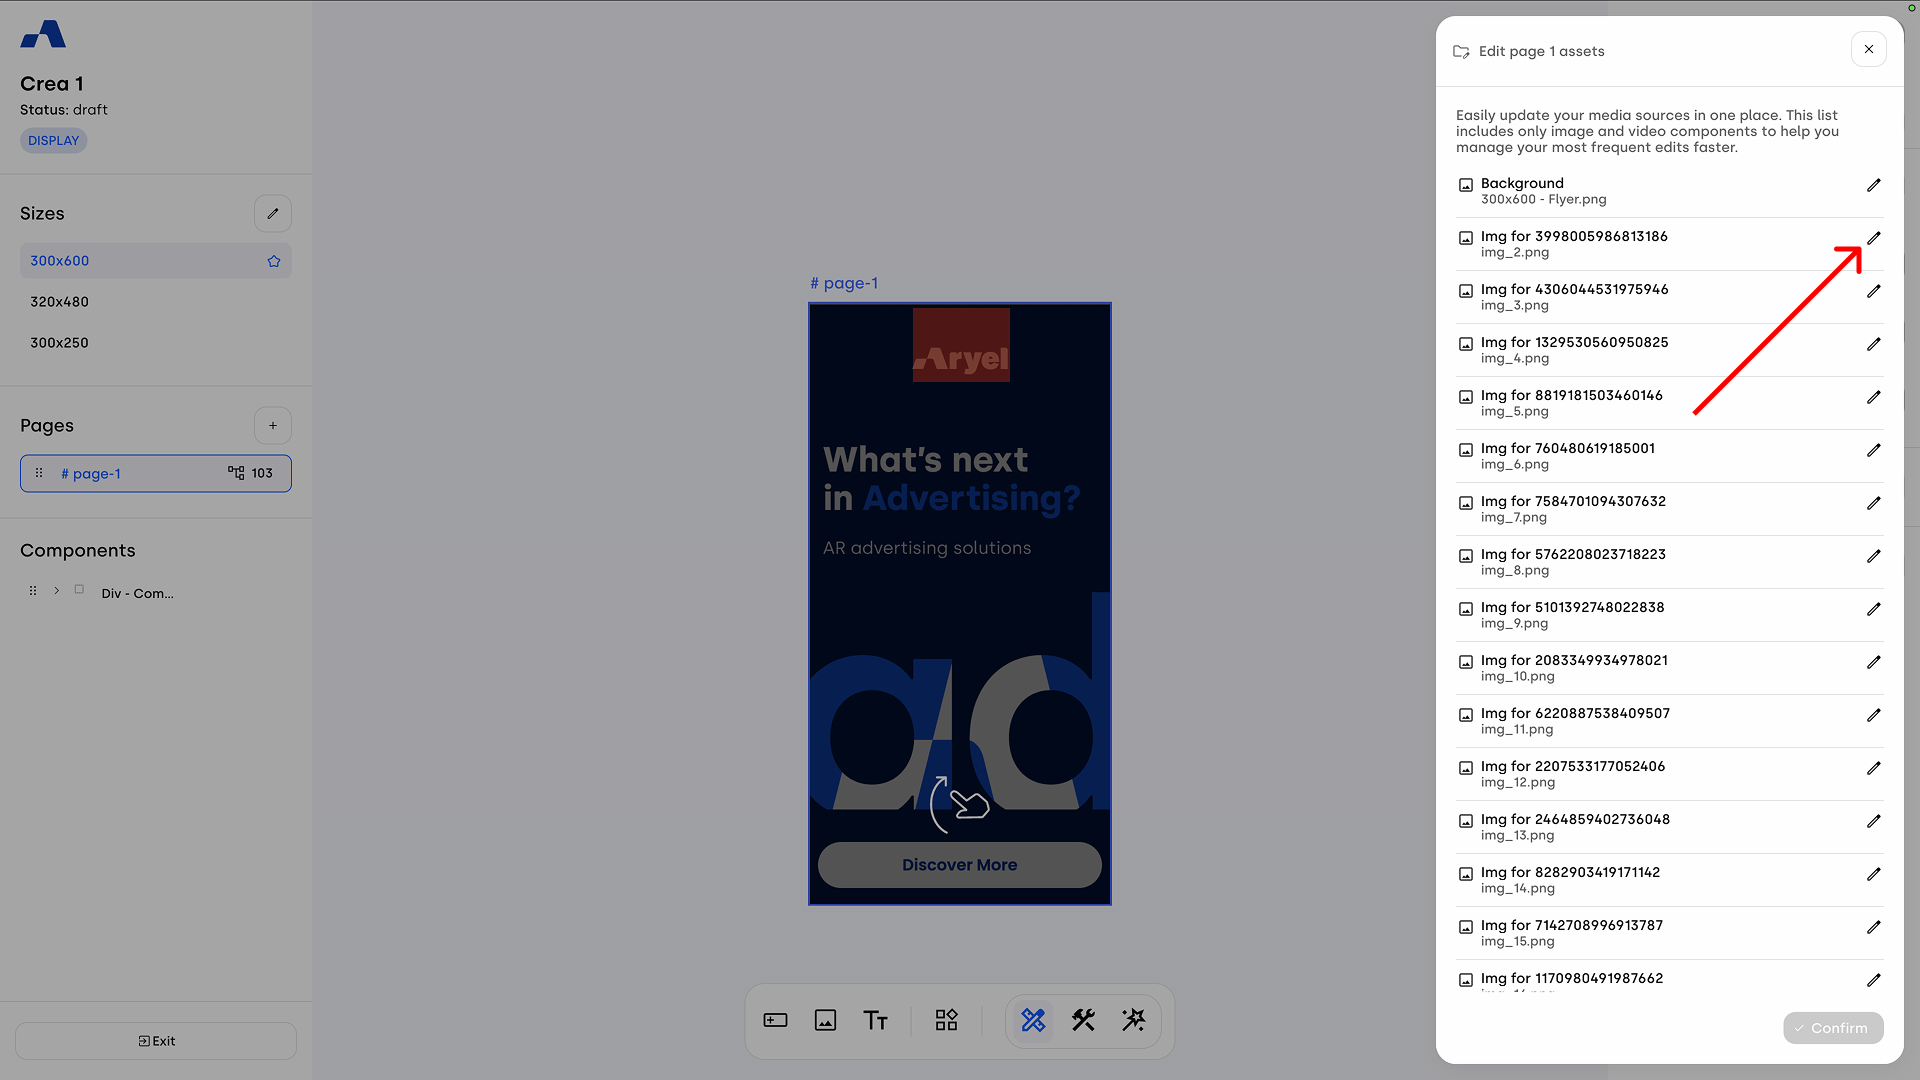
By clicking the pencil icon next to a specific asset, a new modal will open, allowing you to replace the source file for each size with another asset from the library.
Changing an asset in the default size will automatically update it across all other sizes. Conversely, you can customize assets individually for each non-primary size.
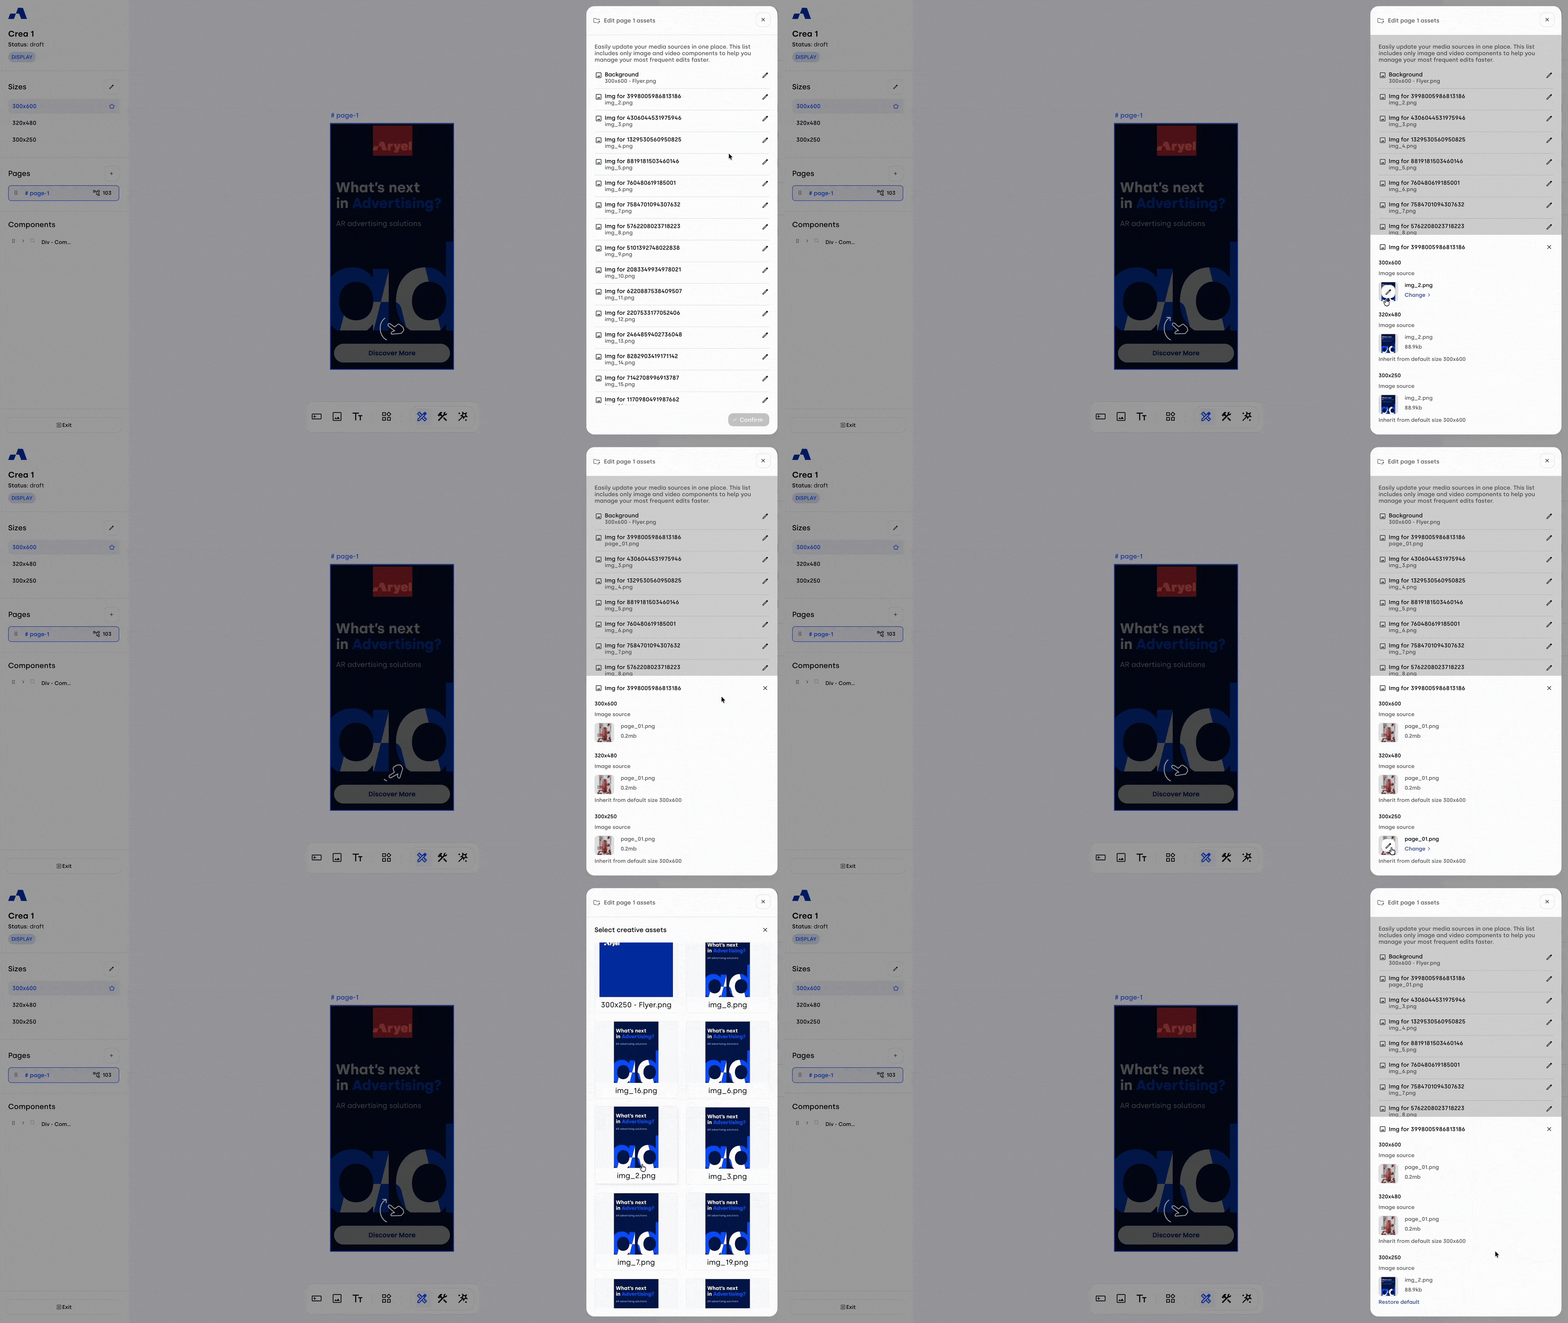
If needed, you can always click the Restore option to revert to the original asset.
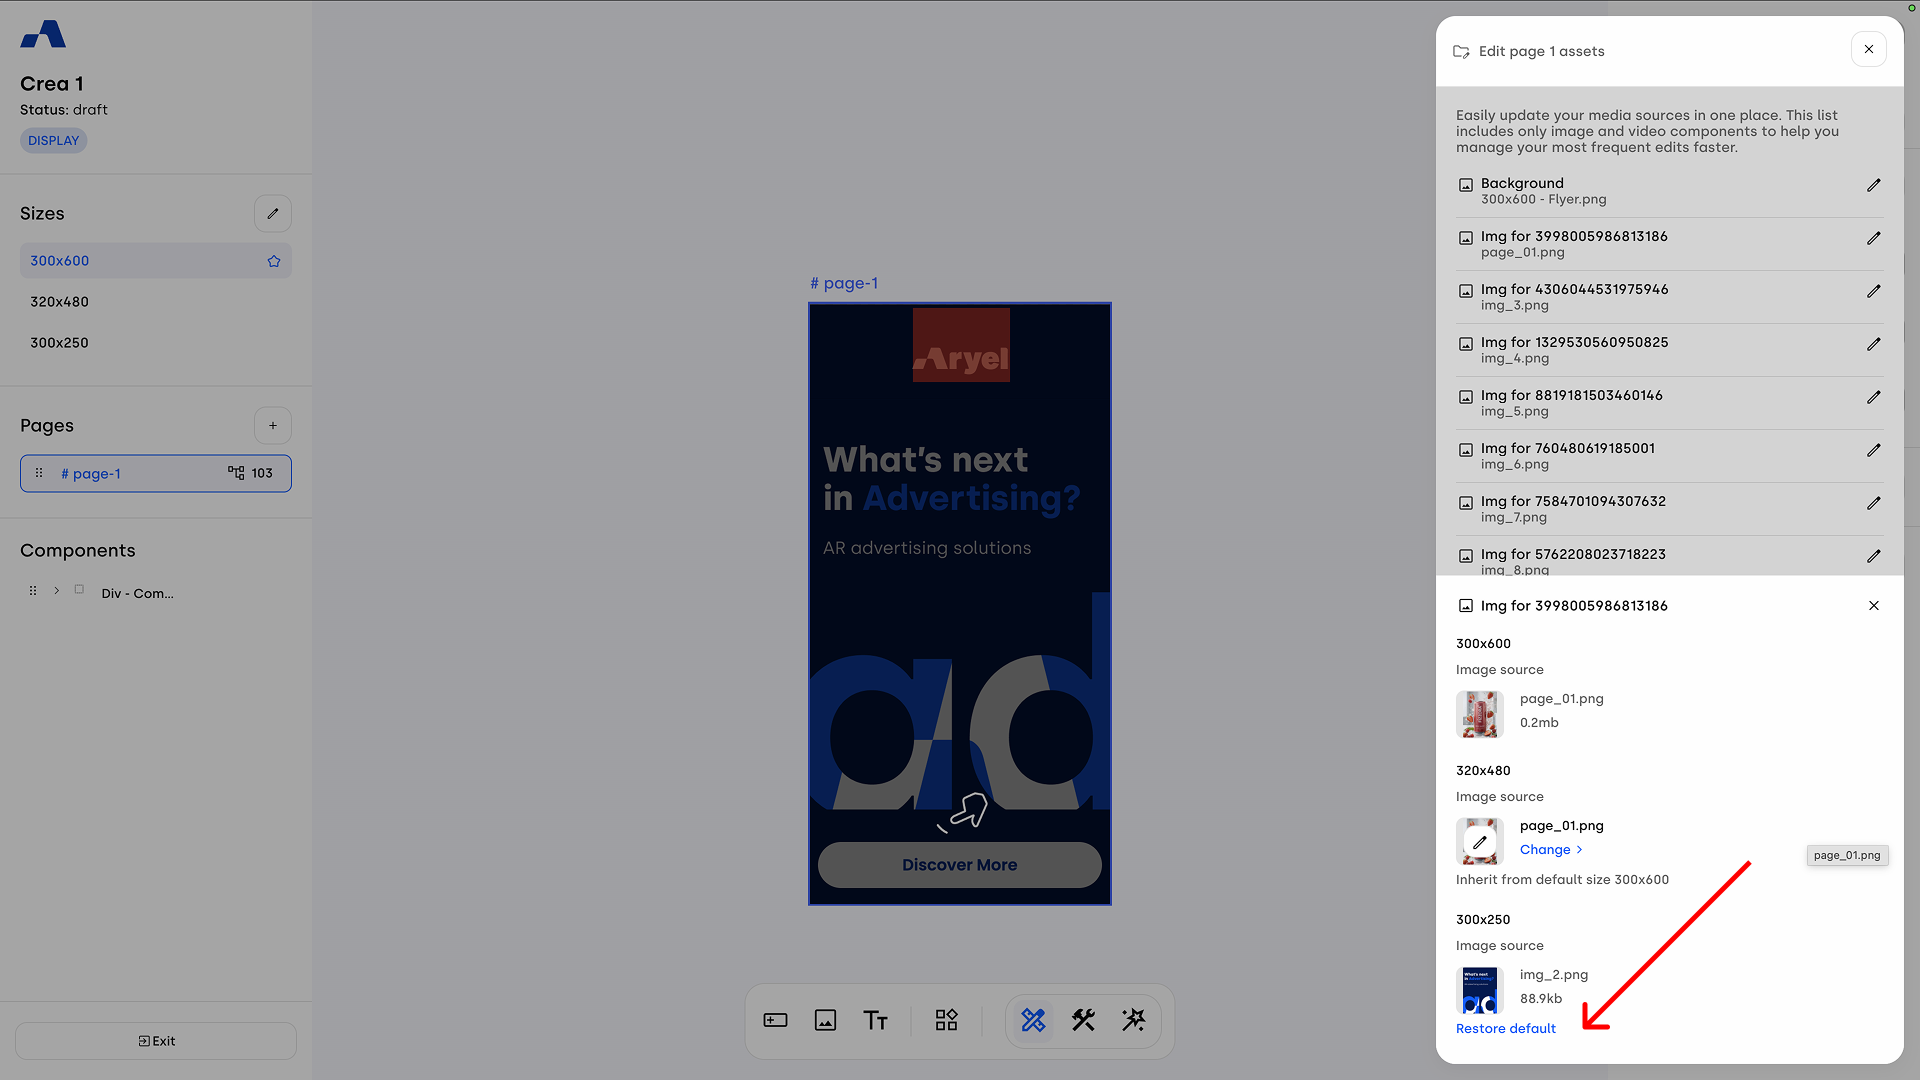
Once you have made your desired changes, click Confirm to apply all the updates to the different sizes of the creative.
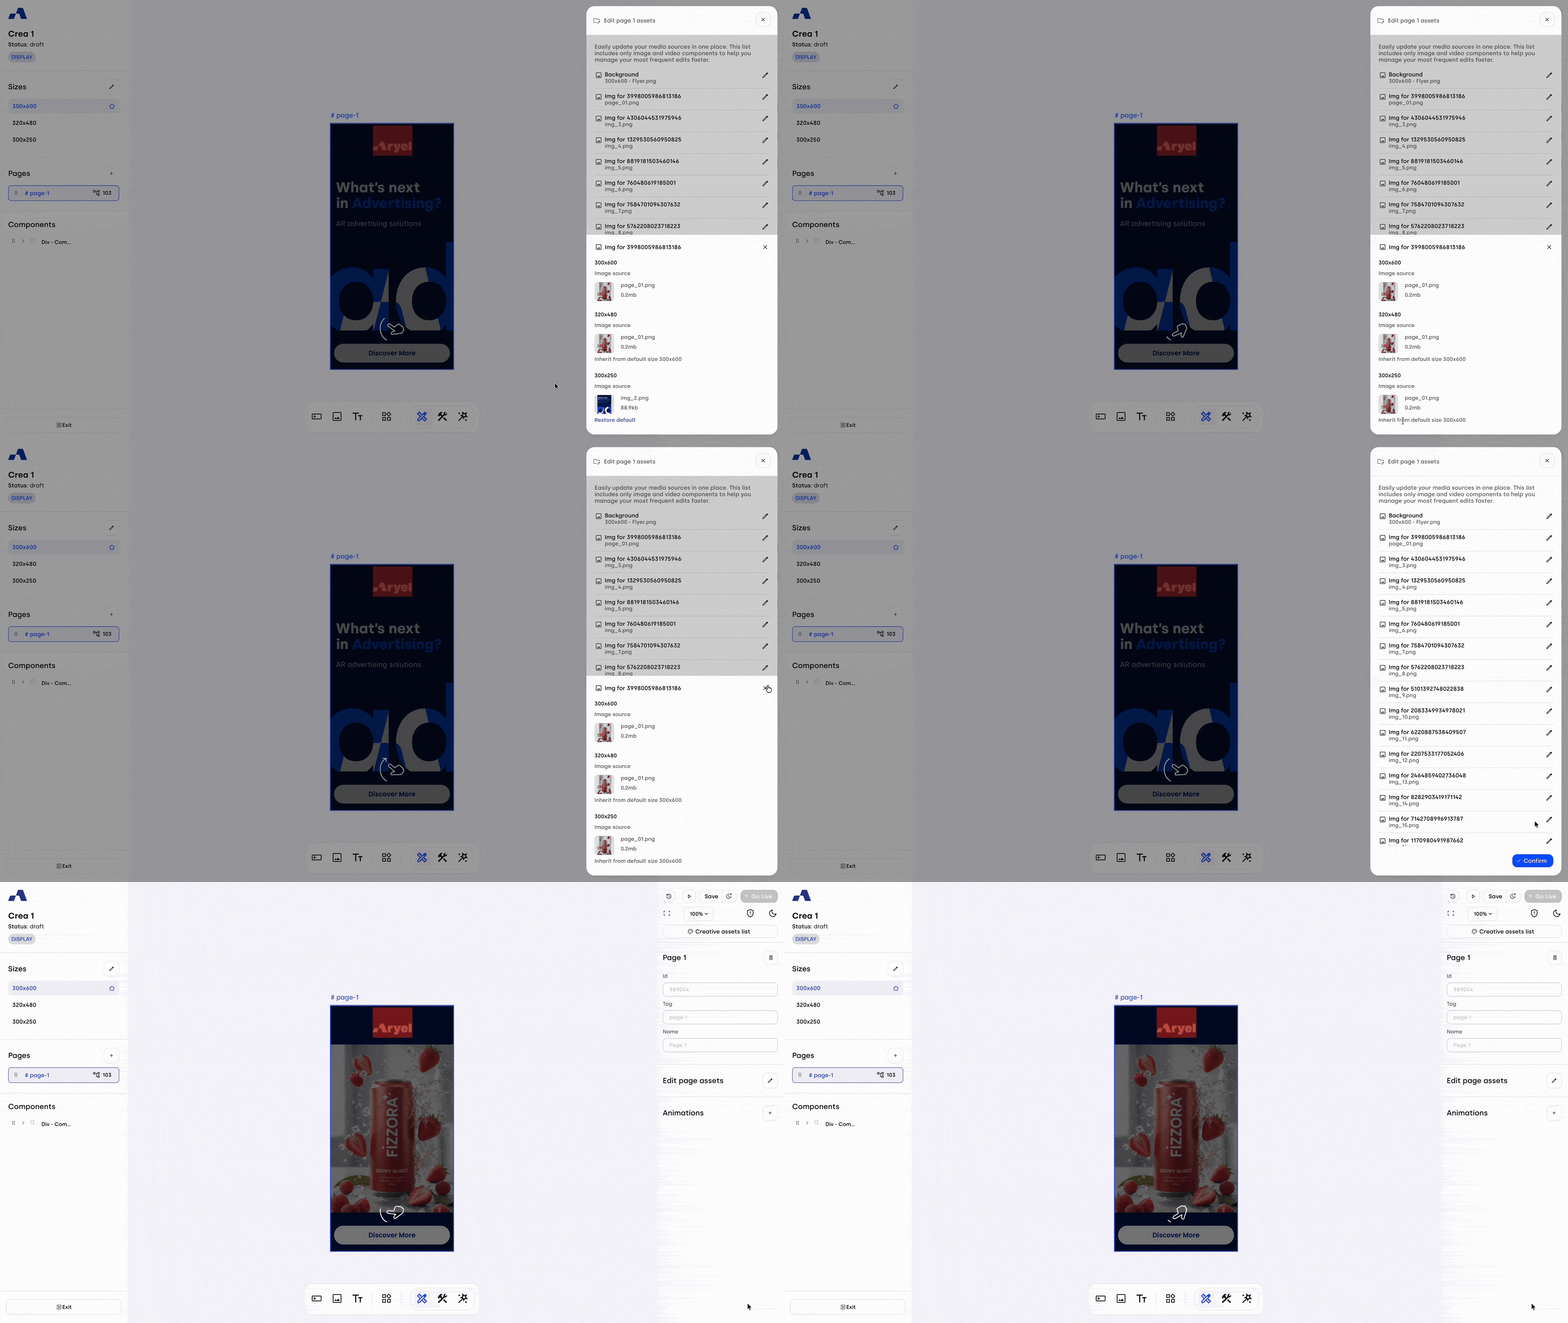
Below the Edit Page Assets, you’ll find the Animations section. By clicking the "+" button, a new animation will be created. Clicking the arrow icon will reveal the timeline at the bottom center of the canvas — this is your space for organizing and managing transitions.
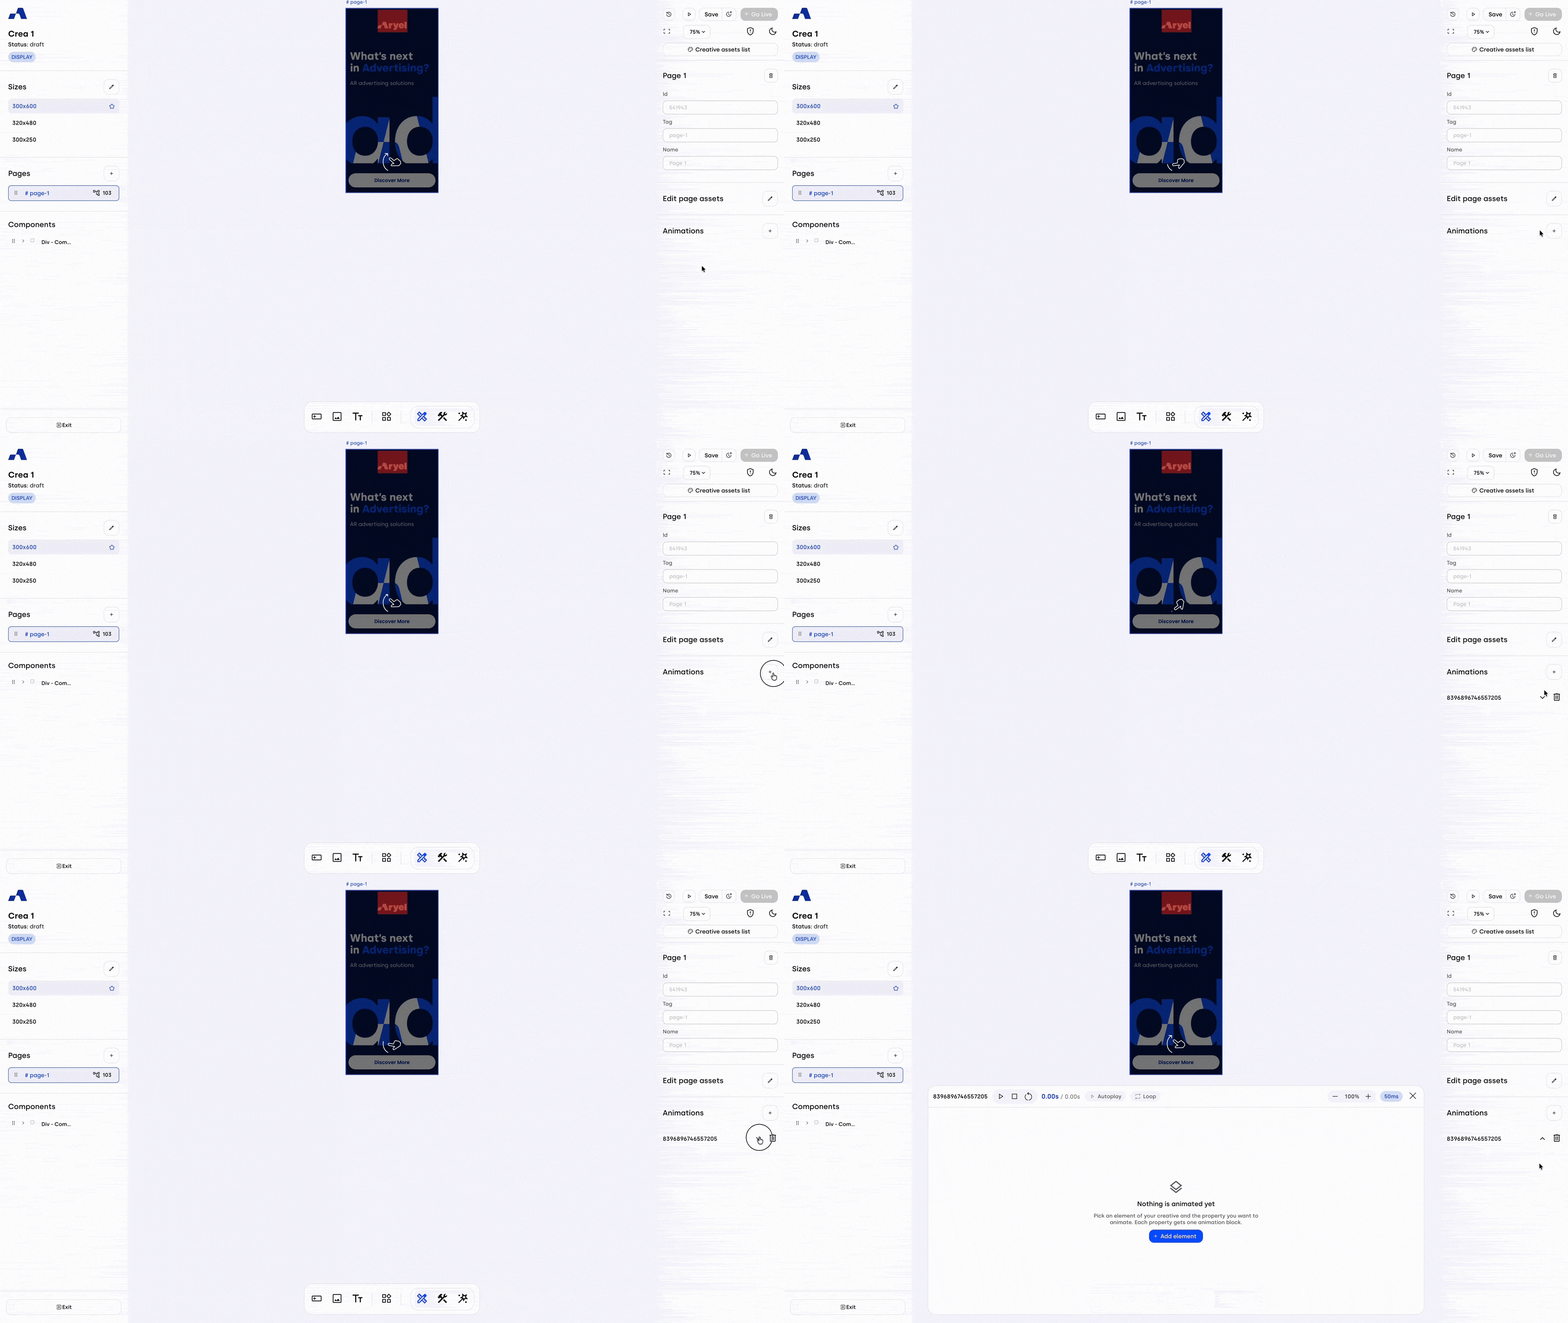
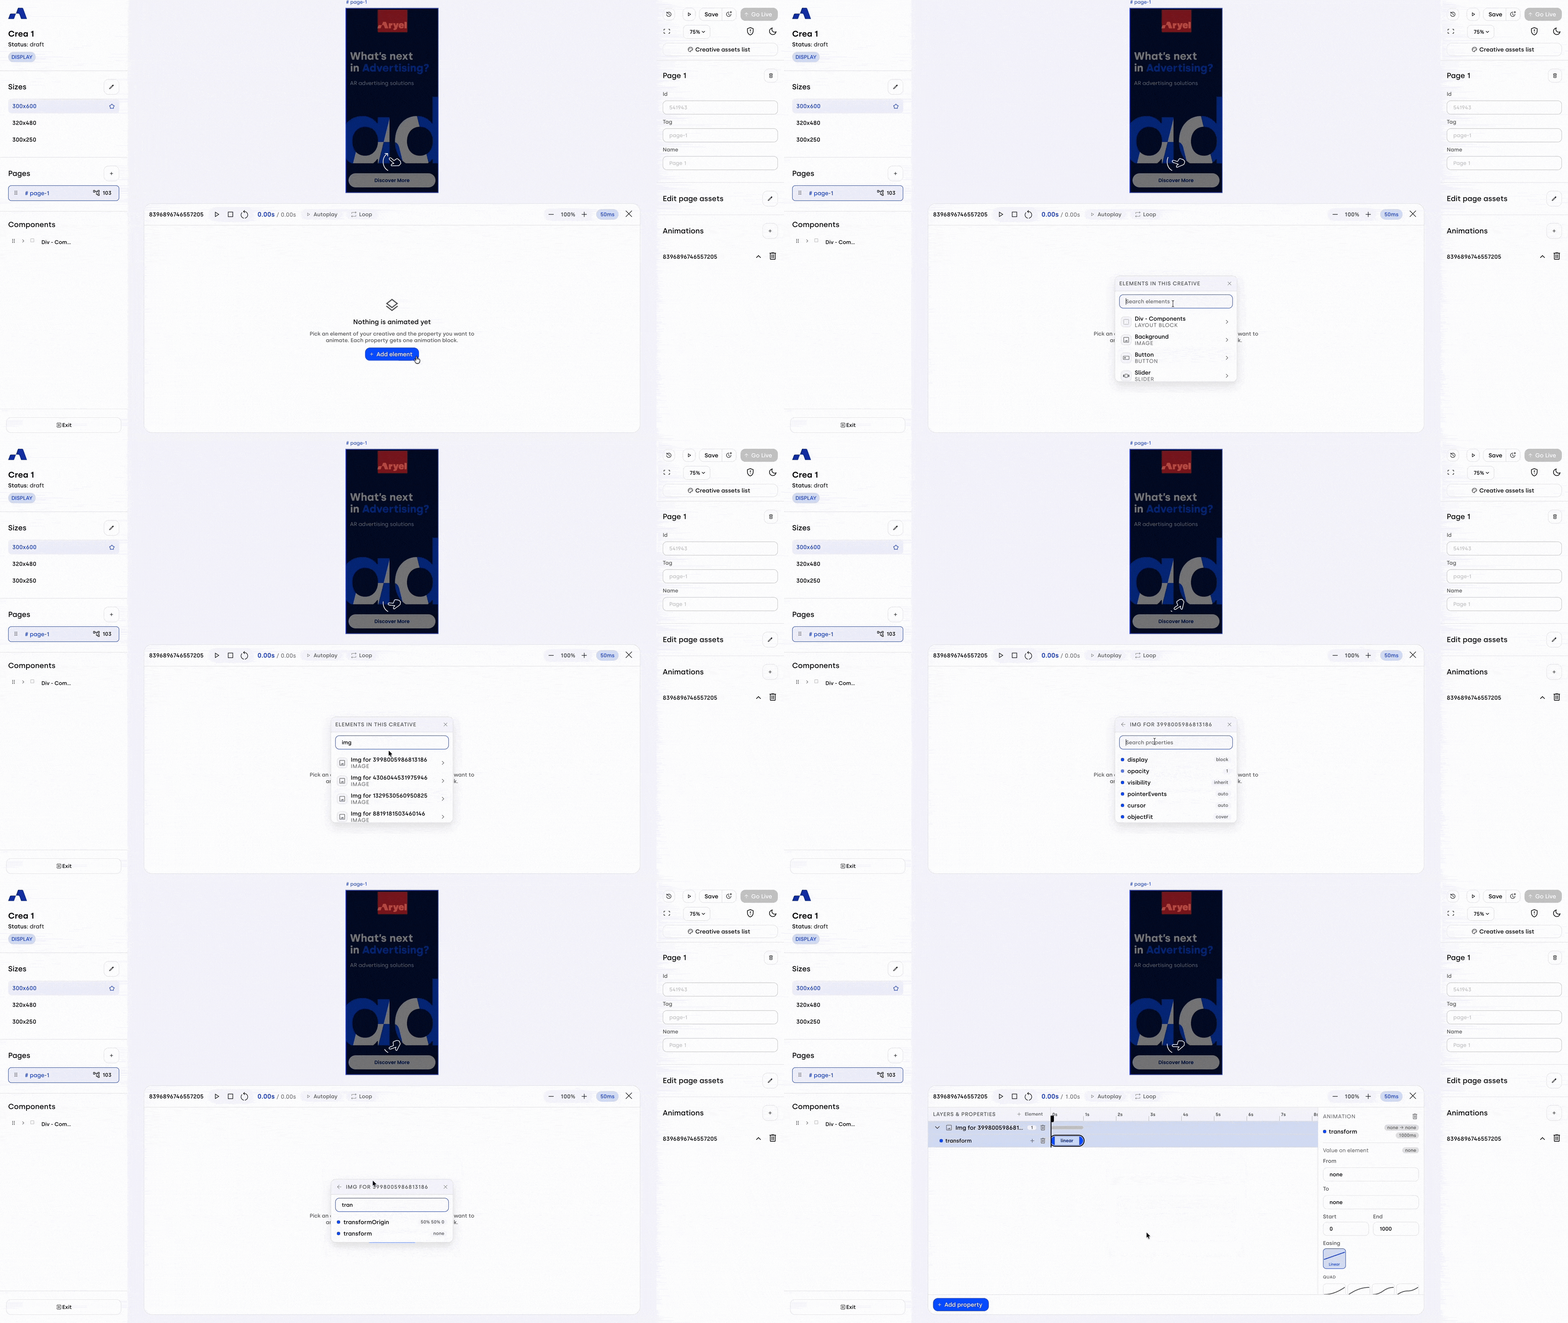
To build a new animation:
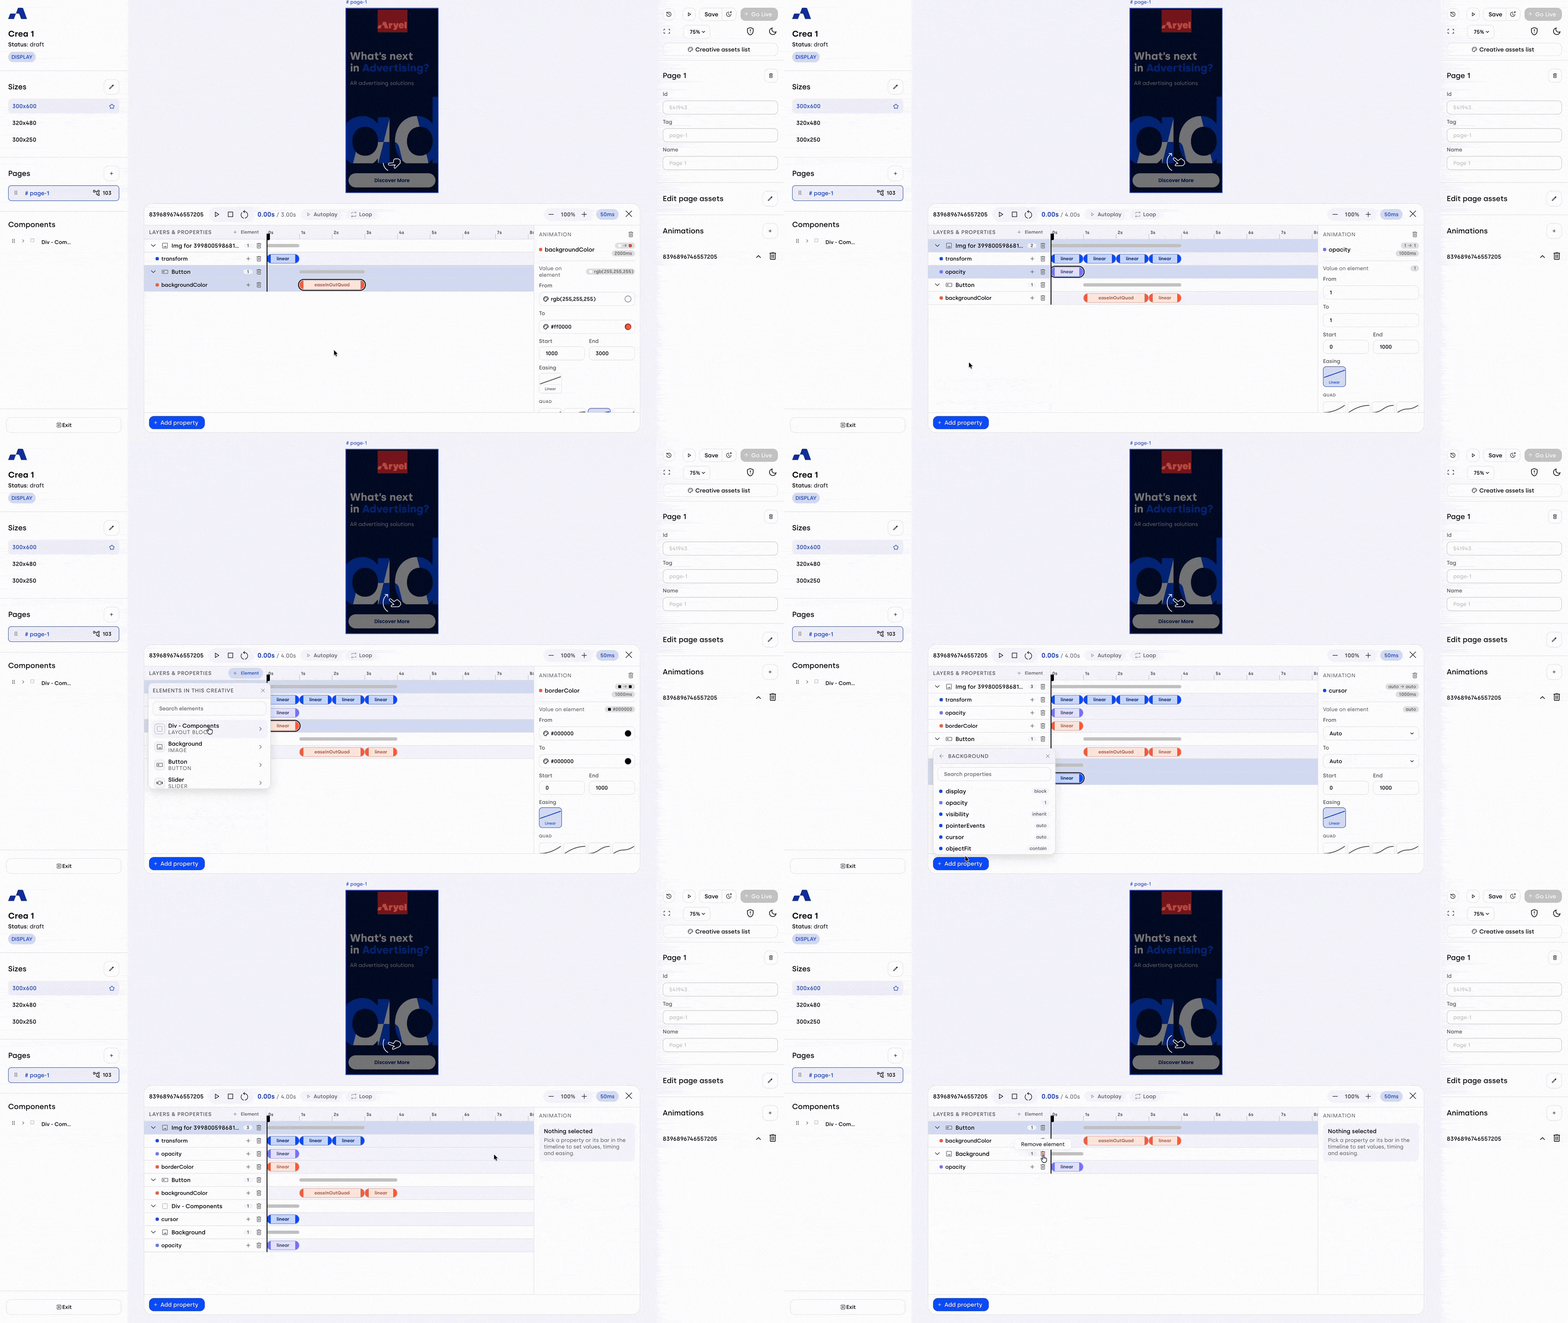
Click the Add element button in the center of the timeline.
Select a component from the list of elements present in your creative (e.g., Layout Block, Slider, Image). You can use the search field in the dropdown to quickly filter and find your desired element.
Choose the specific property you want to animate (e.g., backgroundColor, zIndex, opacity). A search field is also available here to help you find the property faster.
A new animation block representing that property will appear on the timeline.
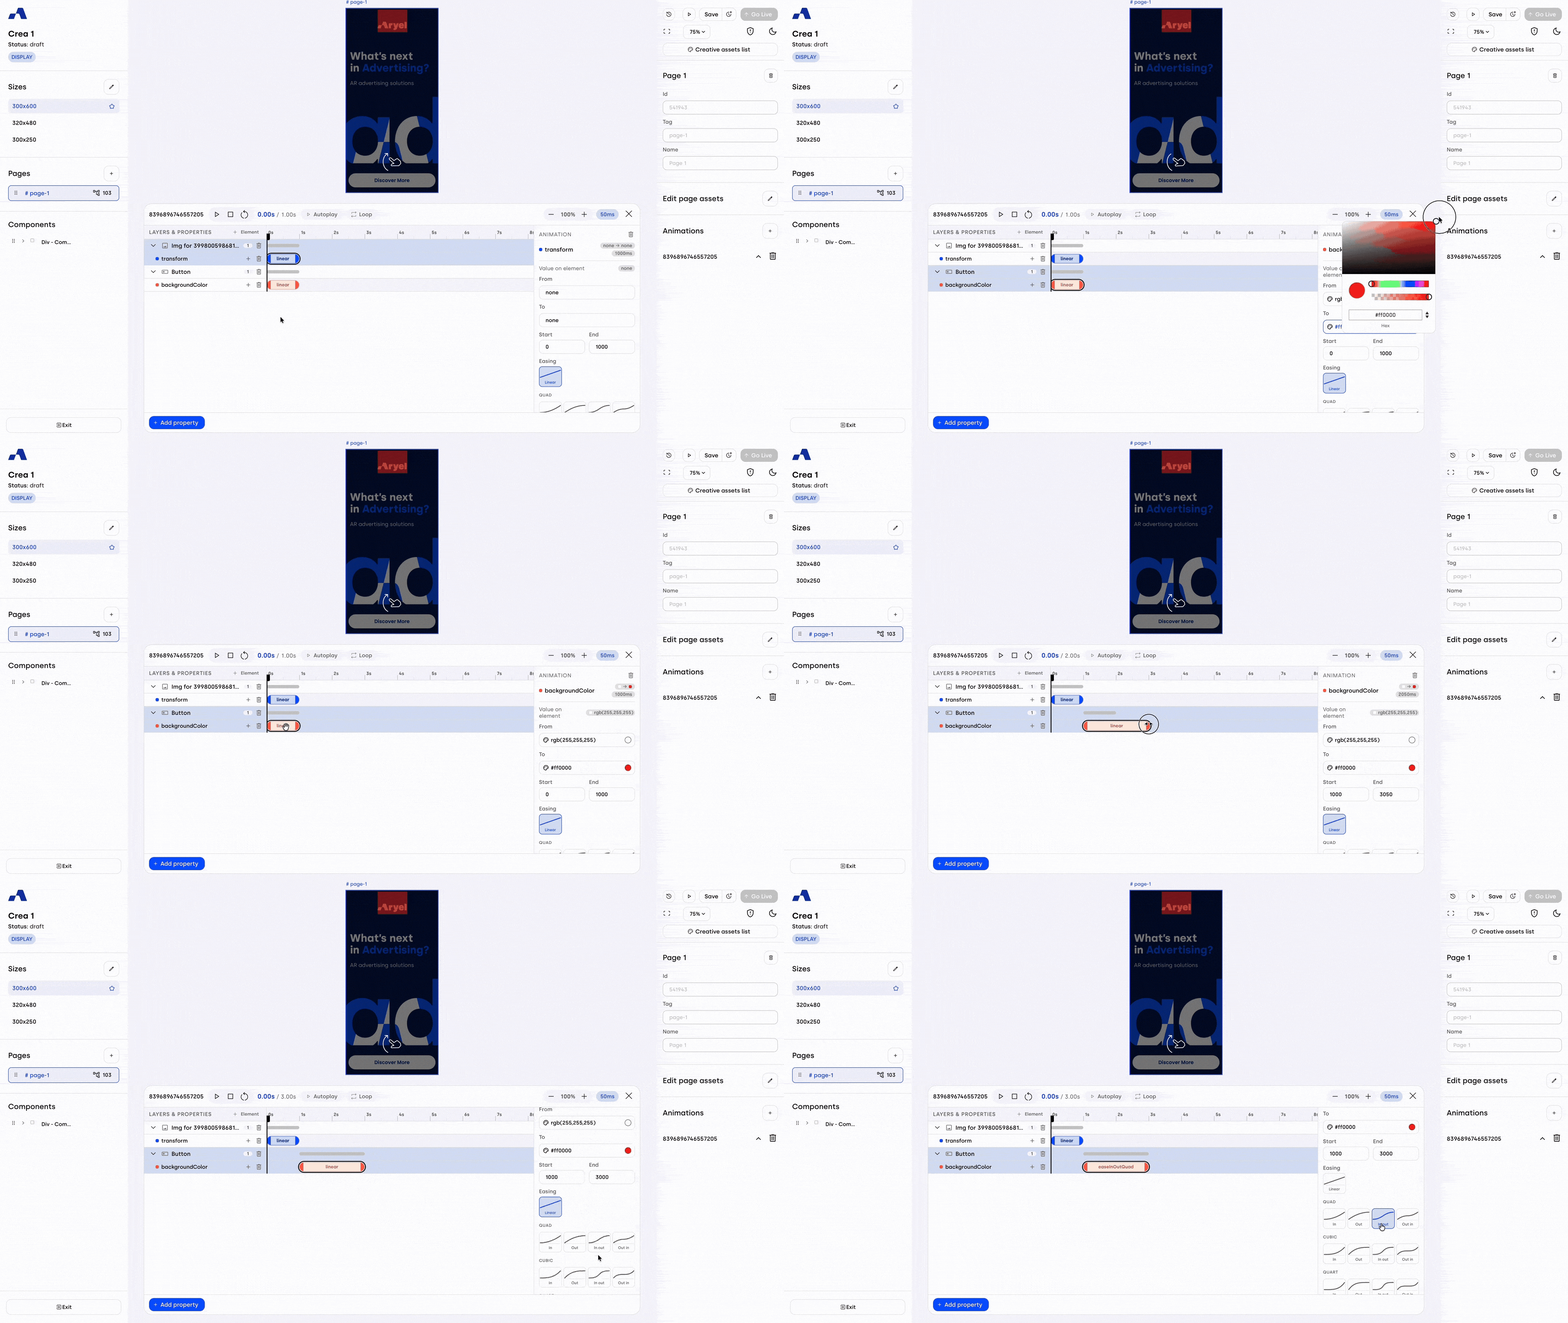
To fine-tune your transition, select the animation block in the timeline. The right sidebar will update to display the animation's specific controls:
Values: Define the starting ("From") and ending ("To") states of the property.
Timing: Manually set the exact "Start" and "End" times (in milliseconds), or adjust the block's edges directly on the timeline.
Easing: Select your preferred easing curve (e.g., Linear, Quad, Cubic, Bounce, Sine) to control the animation's acceleration and deceleration.
Managing Sequences, Properties, and Elements:
Multiple Sequences: You can manage multiple sequences (animation blocks) for the same property by clicking the "+" button located next to the added property's name on the timeline.
Adding Multiple Properties: You can animate additional features of a component by clicking the + Add property button at the bottom of the layers panel.
Adding Additional Components: You can include other components in the same animation by either clicking + Element directly, or by clicking + Add property, pressing the back arrow to return to the element list, and then selecting a new component and its property.
Removing Sequences: Clicking the trash icon in the right-hand panel will remove only the currently selected animation block (Remove sequence).
Removing Properties: Clicking the trash icon located next to the property name on the timeline will delete the entire property and all of its associated blocks (Remove property).
Removing Elements: Clicking the trash icon next to the component's name will remove the entire component, along with all the properties that were set for it in the animation (Remove element).
At the top of the timeline, you’ll find playback controls (Play, Pause, Replay) alongside toggles to set the animation to Autoplay or Loop. You can also adjust your view using the Zoom controls and toggle Snapping (Snap 50ms / Snap off) for keyframe alignment. When resizing blocks directly on the timeline, turning snapping on forces the edges to move in 50ms increments, while turning it off allows for free movement and precise timing values that aren't multiples of 50.
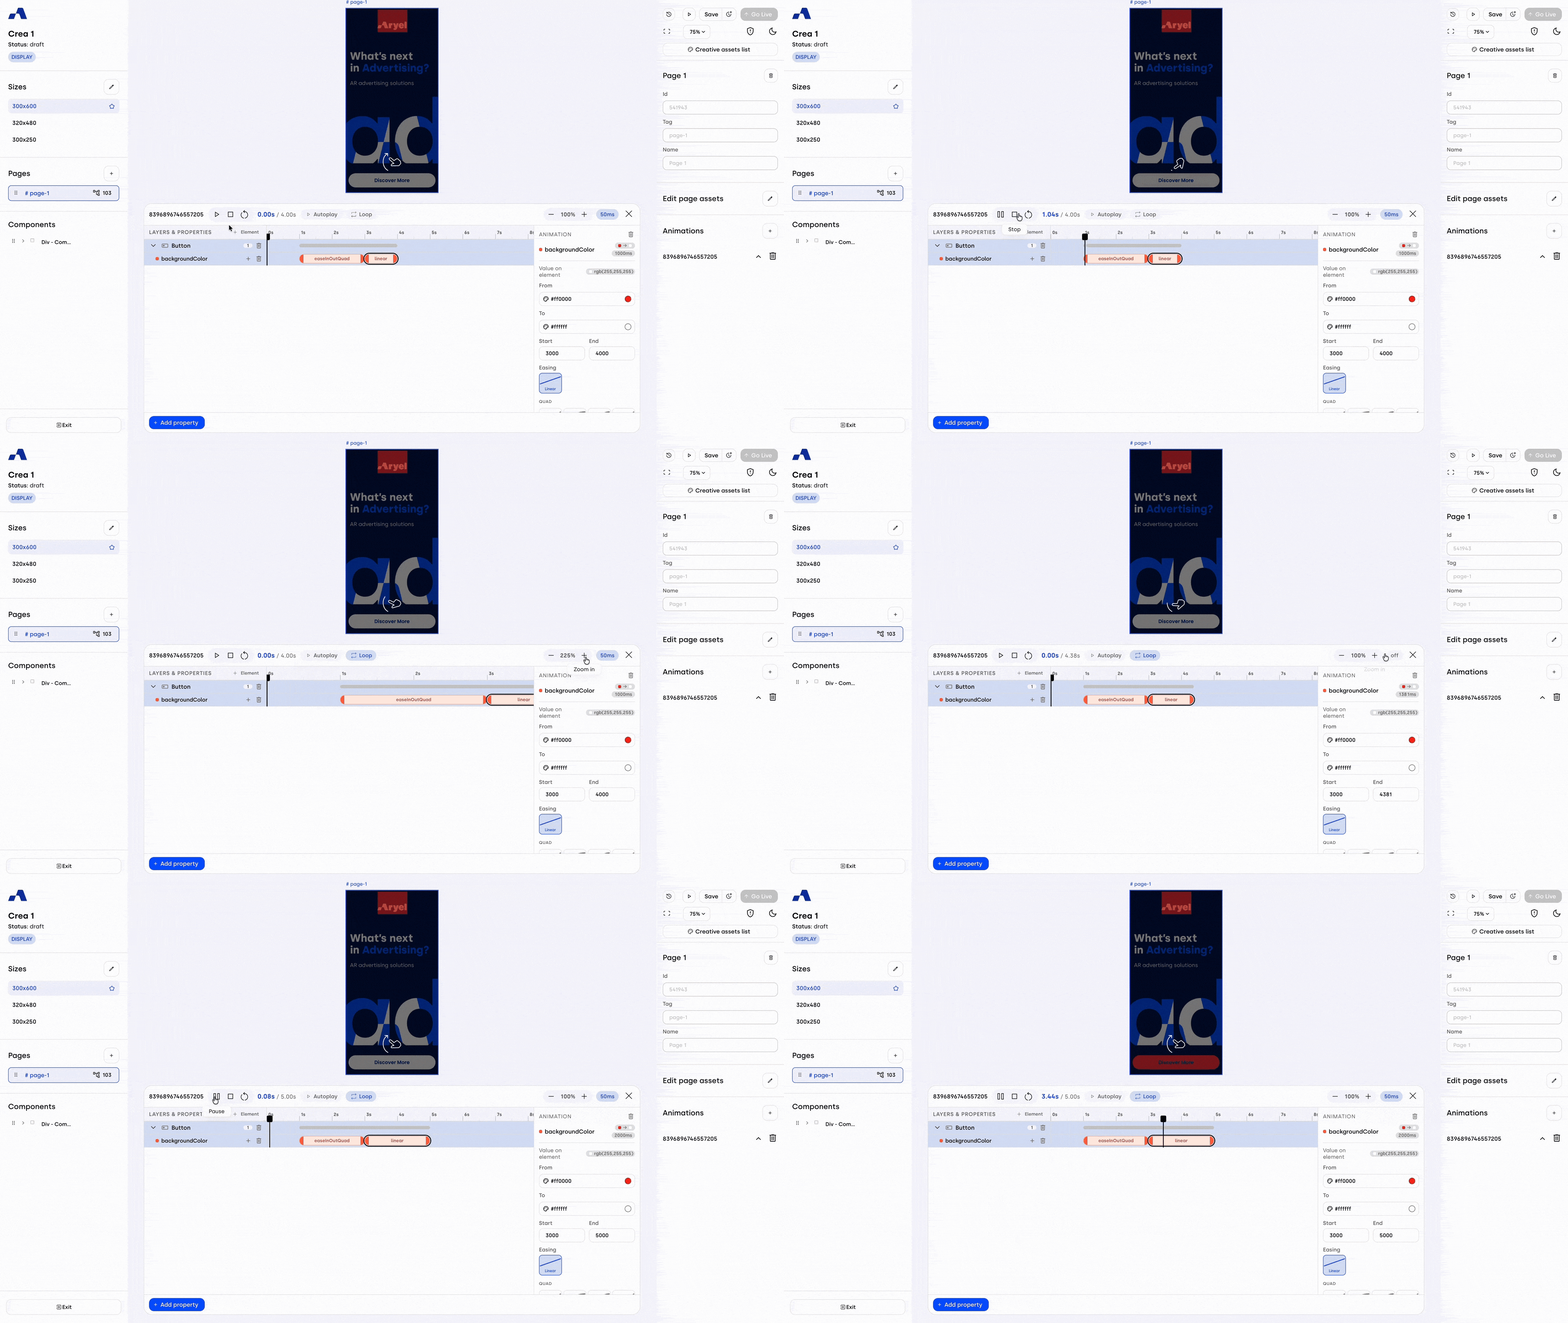
Transitions can be previewed directly within the Builder without switching to the Preview page. However, if you create multiple animations and want to see them all in action together, we recommend using the Preview page.
We’ve implemented a wide variety of transitions — explore them and find your favorites.
Managing pages is a straightforward part of working in the Ads Manager Builder, giving you full control over the structure and flow of your creative.